

A retaining wall with steps works best when the stairs and the wall are designed as one structure, with risers around 7 inches, treads of at least 10 inches, a drainage system behind the wall, and a permit check before the first shovel goes in. Get those four things right and the steps will look good and stay safe for decades. Get them wrong and you will be watching a leaning wall or a wobbly stair within a few seasons.
We build retaining walls, decks, patios and gates across the Fort Worth and Dallas area, so this guide leans on what we see on North Texas yards: clay soil, heavy summer storms and slopes that were never meant to be walked on.
TL;DR
- Build the steps and the wall at the same time. Cutting steps into an existing wall means taking courses apart and cutting a lot of block.
- Use residential stair basics as your starting point: 36 inches of clear width, risers no taller than 7-3/4 inches, treads at least 10 inches deep.
- Drainage decides whether the wall lasts. One analysis found that 68% of 82 studied wall failures came from poor drainage control.
- In Fort Worth, a retaining wall taller than 4 feet, measured from the bottom of the footing, needs a permit. Other cities set different limits, so check yours.
- Expect a wide cost range. One consumer source puts basic steps at $400 to $800, but custom work on a real slope costs more.
Table of Contents
- Why add steps to a retaining wall at all
- Build them together, not later
- Design basics: how steep, how wide, how many
- Materials: what steps are made of
- Drainage is where most walls fail
- Permits, height limits and railings
- What it costs
- How the build goes, step by step
- Our perspective: what we would tell a neighbor
- Work with a builder who handles the whole slope
- FAQ
- Sources
Why add steps to a retaining wall at all
A retaining wall holds back soil so a yard can have two levels. Steps are what make those levels usable. Without them, the upper yard is cut off, and people end up wearing a muddy path along the end of the wall or climbing over the top.
There are three common reasons homeowners ask us for steps:
- Access to a back or side yard that sits above the house.
- A safe route to a deck, patio or gate placed at a different grade.
- A cleaner look. Steps that follow the wall’s material and line make a slope feel planned instead of patched.
The step layout is also a chance to break up a long, blank wall. A set of steps with side walls, a landing or a gentle curve gives the eye something to follow.
Build them together, not later
It is technically possible to add steps to a wall that is already standing. It is rarely a good idea. Practitioners quoted by The Spruce point out that doing it afterward means taking apart existing courses and cutting a lot of block, while building both at once gives seamless alignment.
Design guidance from Allan Block’s stair design bulletin makes the same case: building steps and wall as one concurrent unit cuts down on complex block cutting and gives a uniform structural bond.
In plain terms:
- The wall’s base, drainage stone and any reinforcement grid need to be laid with the stair opening already planned.
- Step blocks stack on the same compacted base as the wall, so settlement is shared, not mismatched.
- Caps, side walls and the first riser all land at predictable heights, which keeps cuts to a minimum.
If you already have a wall and need steps, a builder should inspect it first. A wall with weak drainage or visible bulging is not a good host for new stairs. Sometimes the honest answer is to rebuild that section and put the steps in properly.
Design basics: how steep, how wide, how many
Start with the slope
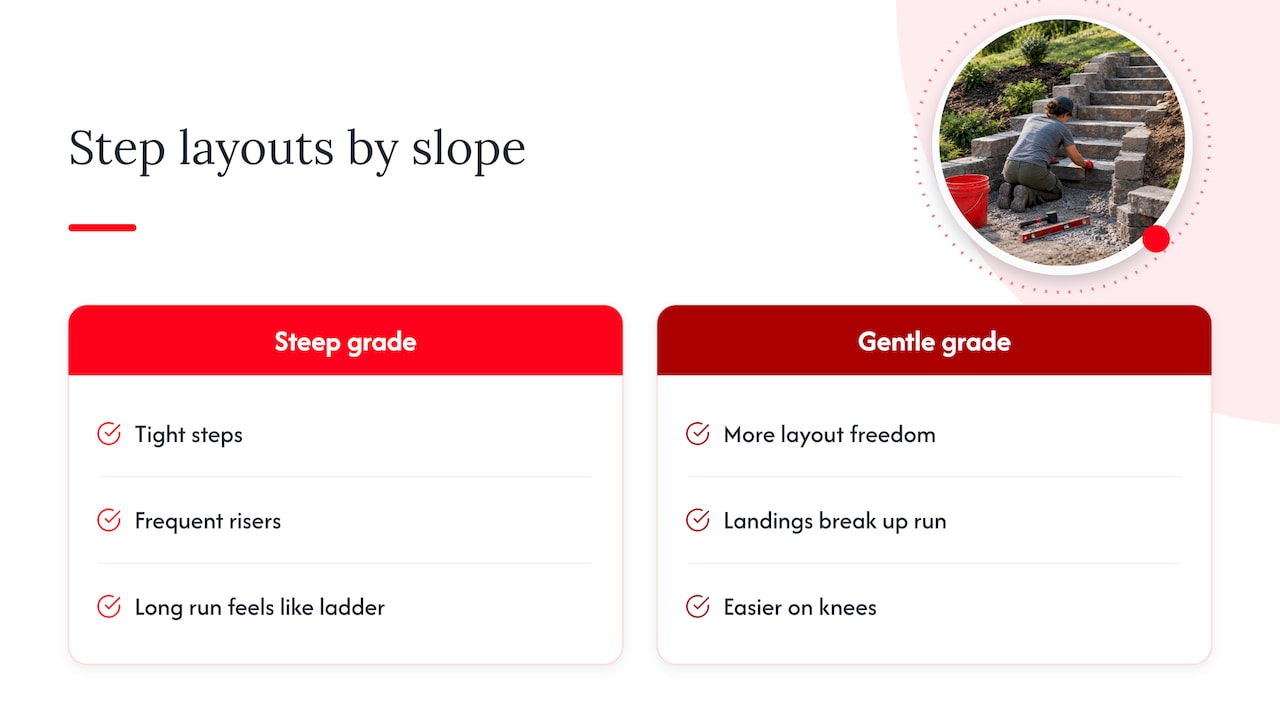
Match the stair layout to the grade. Allan Block’s designers note that steep slopes call for tight steps with frequent risers, while gentle slopes give more freedom, including landings that break up the run and make it easier on knees. A long straight run on a steep grade feels like a ladder. A landing every few steps feels like a garden path.
Use residential stair dimensions as a baseline
Most residential codes in the U.S. start from the International Residential Code. A city building handbook summarizing the 2015 IRC lists these figures:
| Dimension | Minimum or maximum |
|---|---|
| Clear stair width | 36 inches minimum |
| Riser height | 7-3/4 inches maximum |
| Tread depth | 10 inches minimum |
| Variation within one flight | No more than 3/8 inch between the tallest and shortest riser, or deepest and shallowest tread |
| Headroom | 6 feet 8 inches minimum (relevant under a pergola or overhang) |
Those numbers come from one edition of the code. Cities adopt different editions and add their own amendments, and some outdoor garden steps fall outside the code altogether. Treat them as the floor, then ask your city what applies to your yard.
For comfort, we usually aim lower on the riser and higher on the tread than the code minimums. A 6 to 7 inch riser with a 12 inch tread feels natural for most people, including kids and older family members. Whatever you pick, keep it identical for every step. That 3/8 inch limit exists because uneven steps are what make people trip, especially at night.
Work out the math before you choose a layout
- Measure the total vertical rise from the lower yard to the upper level.
- Divide by your target riser height (say 7 inches) and round to a whole number of steps.
- Divide the total rise by that number to get the exact riser height.
- Multiply the number of treads (one fewer than the number of risers when the top surface counts as the last tread) by the tread depth to get the horizontal run.
A 42-inch rise at a 7-inch riser means six risers and a run of roughly five treads at 12 inches, so about 5 feet of horizontal space plus the landing. Many homeowners are surprised by how much room stairs eat up. That is one reason the layout should be settled before the wall is staked out.
Choose a stair shape
- Straight, built into the wall face. Steps cut into the wall line. Saves yard space and looks tidy.
- Projecting steps. Stairs that stick out from the wall. Easier on steep grades, but they take more room.
- Curved or corner steps. Softer and more custom. They need more cut pieces and more careful base work.
- Flanking side walls. Short walls on each side of the steps that follow the stair slope and give a place for lights, planters or a railing.
If you want to see the options before committing, a visual mockup helps. Some homeowners use 3D walkthroughs for landscape design to compare backyard path and step ideas before anything is built.
Materials: what steps are made of
Step material usually follows the wall, though it does not have to.
- Segmental concrete block. The most common choice for steps built into block walls. Pieces interlock, and manufacturers publish step details for straight and curved layouts. Allan Block’s residential installation manual for steps and stairs shows how stairs can be built with curves or straight sides and corners.
- Natural stone. Heavy, handsome and durable. It takes skilled placement, and each stone needs to sit on a firm base.
- Poured concrete. Good where you want clean lines or where the wall itself is concrete. A poured step can also be finished with texture for grip. For more on surface choices, see our guide to slippery concrete patios and how to fix them.
- Timber. Lower cost up front, shorter life, and more sensitive to water. If you are considering it, read what we have learned in timber retaining wall drainage lessons first.
For sustainability-minded homeowners, ask about locally sourced stone, recycled-content block and long-life materials. A wall that lasts 40 years is greener than one rebuilt at year 12.
Drainage is where most walls fail
Beautiful steps on a failing wall are a bad deal. A published analysis of wall failures found that 68% of 82 evaluated failures were caused by inadequate drainage control. The same source notes that in fine-grained soils such as silt or clay, water has to be managed carefully behind the wall, sometimes with geomembrane encapsulation.
North Texas is clay country. Clay swells when wet and shrinks when dry, and it holds water against a wall instead of letting it pass. A local supplier’s guide to retaining wall drainage in North Texas clay describes the standard system: perforated pipe, non-woven fabric, geogrid and free-draining backfill instead of native clay.
Steps add their own drainage questions:
- Water running down the stair run should not pour behind the side walls or under the first tread.
- The base under the steps needs the same compaction and drainage stone as the wall.
- The pipe behind the wall needs a daylight outlet that does not end at the foot of your stairs.
- Downspouts, irrigation heads and swales above the wall should point away from it.
Our separate pages on retaining wall drainage and terraced wall failures go deeper on layouts and fixes.
Permits, height limits and railings
Permit rules are local. A county permit page in Virginia states that retaining walls over 3 feet of unbalanced backfill typically need a permit, and it also notes that rules differ by municipality. In Fort Worth, the city’s residential permitting page says retaining walls greater than 4 feet tall, measured from the bottom of the footing to the top of the wall, require a permit. It also lists retaining walls among accessory structures that may need review. Rules in Dallas, Arlington, Keller and other nearby cities can differ, so confirm with yours.
A few situations raise the stakes:
- A driveway, shed or other structure sitting above the wall adds load, and many cities treat that differently from a plain slope.
- Walls that support steps and a patio or deck on top often need engineered design.
- A drop beside the stairs may call for a guardrail. Our guide to guardrail rules for retaining walls explains safe attachment, and deck railing height covers the 36 versus 42 inch question.
- Planning a fence on top of the wall? See our checklist for a fence on a retaining wall before you set posts.
For height details, we explain the thresholds in our retaining wall height limit guide. If your steps lead up to a deck, the deck stairs code page applies to that last flight.
A permit is not paperwork for its own sake. A wall built without one where it was needed can be forced to be removed or retrofitted, and that costs far more than the permit.
What it costs
We do not publish fixed prices, because every slope is different and a number without a site visit would mislead you. Here is what outside sources say.
The Spruce estimates an average of $400 to $800 for building standard steps into a wall, and a basic installation timeline of one to two days. Treat that as the low end for a simple case. Custom-designed steps, tall walls, curved layouts, hard access, poor soil or engineering requirements push the cost up.
What moves the price most:
- Wall height and length. The steps are only a part of the total.
- Number of risers and landings.
- Material. Stone and custom concrete cost more than standard block.
- Soil and drainage work. Clay, seepage or a high water table can add excavation, stone and pipe.
- Access. If a skid steer cannot reach the site, labor goes up.
- Engineering and permits when your wall is tall or carries a surcharge.
For a deeper look at how contractors price these jobs, this explanation of retaining wall cost drivers is written for Virginia homeowners, but the drivers carry over. Our own page, retaining wall cost in 2026, covers the wall side of the budget.
How the build goes, step by step
Here is the sequence on a well-run job:
- Site visit and measurements. Total rise, run, soil, where water comes from and where it should go.
- Design and permit check. Stair dimensions, wall height, any engineering, utility locates.
- Excavation. The trench for the wall base and the stair footprint, dug to depth and width for both.
- Base and compaction. Compacted aggregate, level and consistent.
- Drainage. Perforated pipe, fabric and clean stone before backfill.
- Wall and steps rising together. Courses laid with step units, side walls and any reinforcement grid.
- Backfill in lifts. Free-draining material compacted in layers.
- Caps and finishing. Our notes on retaining wall caps explain what holds up over time.
- Final grading and cleanup. Surface water is directed away from the wall.
A small, straight set of steps can be done in a day or two. A long wall with curved steps and drainage can run for days or weeks.
Our perspective: what we would tell a neighbor
After more than 20 years of building outdoor structures, the pattern is consistent: the steps people regret are the ones that were an afterthought. Someone built the wall, then decided they wanted a way up, then asked a crew to hack a notch into finished block. The notch is always where the drainage is weakest and the base is thinnest.
Our advice is simple. Decide how you will walk the yard before you decide how the wall looks. Pick riser and tread sizes you like to climb, and keep them identical. Spend the money on what you cannot see: base, drainage, compaction. Choose materials that will outlast a decade of Texas clay movement. And ask a licensed, insured builder to walk the site with you, because a slope tells you things a drawing cannot.
We also care about doing this with less waste. That means building it right once, using durable materials, and tailoring the design to the yard and the budget instead of selling a standard package.
— Abraham
Work with a builder who handles the whole slope
If you want steps, a wall and the surrounding work planned together, we can help. We do retaining walls, concrete and masonry, landscaping and hardscaping, and gates, so the stairs, the patio at the top and the fence or gate beside them can be coordinated on one job. Our builders are licensed and insured, and we offer free quotes. See our full list of services, or start from our home page to request a quote.
FAQ
Can I add steps to an existing retaining wall?
Yes, but it is harder and often costs more than building them together. The builder has to remove existing courses, cut block and rebuild the base under the stair area. A wall with drainage problems or bulging should be repaired first.
How tall can each step be?
In the 2015 IRC, residential risers are capped at 7-3/4 inches, and treads must be at least 10 inches deep. Your city may use a different edition or add its own rules. Keep every riser within 3/8 inch of the others.
Do I need a permit for a retaining wall with steps?
It depends on the wall height and your city. Fort Worth requires a permit for retaining walls greater than 4 feet tall, measured from the bottom of the footing, and other cities set lower or different limits. Check with your building department before you start, especially if there is a driveway or structure above the wall.
How long does it take to build?
One source says a basic installation of steps can take one to two days. A full wall with drainage, curved steps and engineering takes longer. Weather and soil conditions also change the schedule.
Do retaining wall steps need a handrail?
It depends on the number of risers, the drop beside the stairs and local code. Many cities require a handrail past a certain number of risers and a guard where there is a significant drop. Ask your building department, and see our guardrail guide for attachment methods.
Sources
- Retaining Wall Steps, The Spruce
- Stair Design bulletin, Allan Block
- Retaining Walls Steps and Stairs installation manual, Allan Block
- Building Handbook, 2015 IRC stair dimensions, City of Brandon
- The Importance of Drainage Control for Geosynthetic Reinforced MSE Walls
- Retaining Wall Drainage in North Texas Clay, Outdoor Warehouse Supply
- When a Building Permit is Required, Henrico County, Virginia
- Residential Permitting, City of Fort Worth