
Yes, you should cap a finished retaining wall in most cases. Capping sheds water and finishes the top edge cleanly, so pick a cap that matches your wall system and local freeze-thaw exposure, and lean on trapezoidal caps for curves. Stop and call a professional first if you see leaning, bulging, or large cracks, or if your wall is near permit height thresholds.
TL;DR:
- Caps prevent water entry into joints and protect the core fill but cannot fix structural issues like leaning, bulging, or large cracks.
- Natural stone caps are durable and upscale but heavy and expensive, while precast concrete offers a lighter, more affordable alternative with many textures and colors.
- Proper installation requires dry-laying caps, using flexible adhesive beads, and checking for levelness, pattern, and overhang before curing.
- Curved or corner walls benefit from trapezoidal or dual-sided caps, which reduce trimming and improve appearance, especially for radii or tight curves.
- For walls showing signs of instability or poor drainage, professional assessment is essential before capping to address underlying structural or drainage problems.
Table of Contents
- What retaining wall caps do and what they don’t do
- Choosing a cap material: pros, cons, and matching to the wall
- Step-by-step installation checklist for homeowners
- Adhesives, durability, and freeze-thaw best practices
- How to handle curves, corners, and saw-cutting caps
- Estimating cap quantities and a realistic cost picture
- When to hire a pro: structural signs, permit thresholds, and drainage fixes
- Before setting a single cap, a thorough inspection of the top course for alignment, cracking or rocking blocks, drainage effectiveness, base compaction, and any nearby surcharge load like a patio slab or driveway is necessary.
- Author perspective from Abraham: safe DIY limits and recommended next steps
- How Action Fence and Deck can help with your retaining wall
- FAQ
- Sources
What retaining wall caps do and what they don’t do
A retaining wall cap is the flat unit set on top of the last course of block, brick, or stone. It finishes the wall visually and seals the top-course joints against rain and runoff, which matters because water entering those joints is one of the fastest routes to loosened blocks and frost heave.
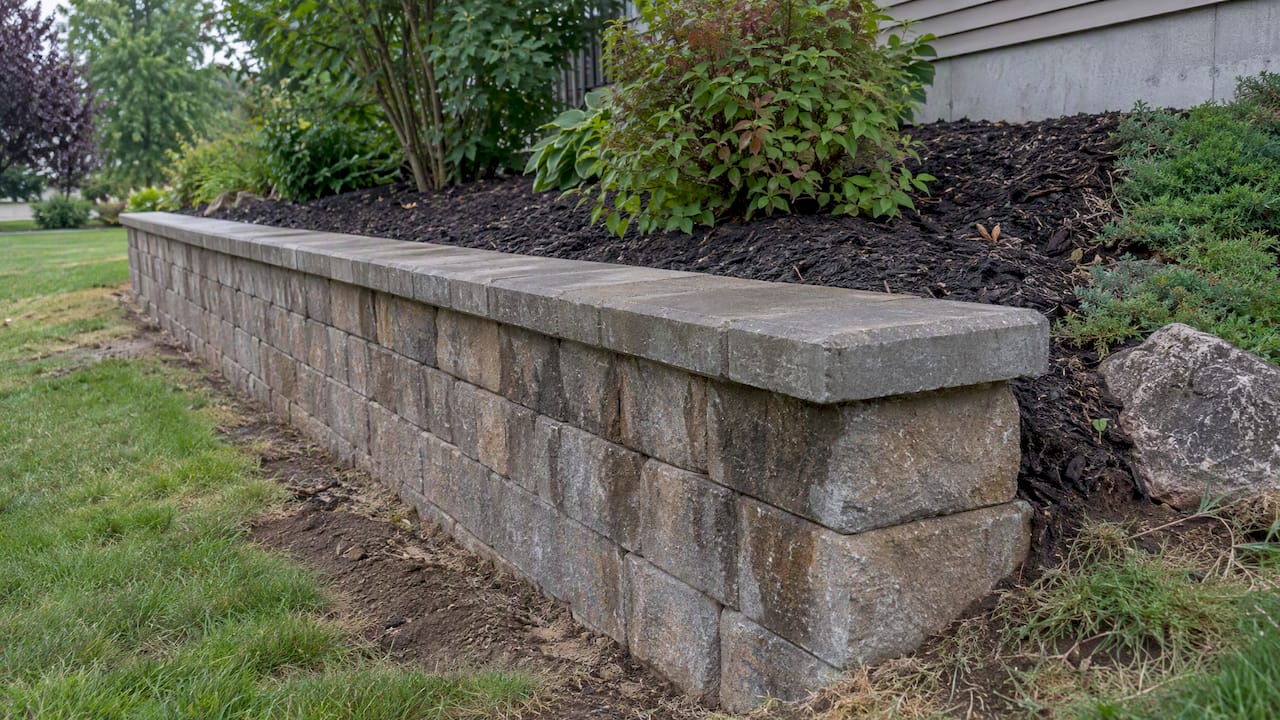
Caps also protect the core fill material in hollow block systems and give the wall a level, walkable or sit-friendly surface. According to MSU’s segmental retaining wall construction standards, capping is treated as a finishing detail, while drainage and the engineered design behind the wall are what actually determine long-term performance.
What a cap cannot do:
- Fix a wall that is already bulging, leaning, or cracked from soil pressure.
- Replace missing or clogged drainage behind the wall.
- Correct a geogrid or base compaction mistake made during original construction.
- Stop hydrostatic pressure from building up after heavy rain.
Think of a cap as the roof shingles of the wall system: essential for shedding water, useless if the framing underneath is already failing.
Choosing a cap material: pros, cons, and matching to the wall
Material choice drives both the look and the physical demands of installation. Natural stone caps look the most upscale and age well, but they are heavy, often irregular in thickness, and usually the most expensive option to buy and set. Precast or wet-cast concrete caps cost less, come in dozens of textures and colors, and are light enough for one person to handle comfortably.
Cast stone splits the difference: it mimics natural stone’s texture at a lighter weight and a lower price than quarried material, though it rarely matches real stone’s color variation exactly. Paver-style toppers work for low garden walls but tend to look thin and utilitarian on taller retaining structures.
A few practical rules make the decision easier:
- Buy caps from the same manufacturer as your wall block when possible; matched geometry avoids gaps and awkward overhangs.
- Favor trapezoidal or double-sided caps on curved walls since they reduce field cutting compared with rectangular units.
- Confirm thickness and footprint before ordering. Common retail sizes run from roughly 2.5 inches to 3 inches in height and 12 inches to 16 inches in length, as shown on listings like the Techo-Bloc York cap and Lowe’s Pavestone cap pages.
- Check local supplier stock before committing to a style. Discontinued colors and limited runs are common in masonry products.
Weight matters more than most homeowners expect. A natural stone cap can be two or three times heavier than a precast equivalent of the same footprint, which changes how many pieces you can comfortably lift and set in a single session.
Step-by-step installation checklist for homeowners
Capping a stable, low wall is a manageable weekend project if you follow a consistent sequence.
- Inspect the top course for cracks, rocking blocks, or uneven settlement, and confirm water has been draining away rather than pooling behind the wall.
- Dry-lay a run of caps without adhesive to check the pattern, spacing, and how much overhang you’ll get at the front edge.
- Snap or stretch a string line along the back edge of the wall to keep the cap row straight even if the block below has minor variation.
- Apply a flexible exterior adhesive in two continuous beads, one near the front and one near the back, following the bead width your manufacturer recommends, per guidance in the VERSA-LOK technical bulletin.
- Set caps in small groups of four to five pieces at a time rather than placing one and moving to the next; this keeps the adhesive workable and the line straight.
- Press each cap down and align it to the string line and its neighbors before the adhesive begins to skin over.
- Let the adhesive cure for the full time listed on the product label before walking on the caps or exposing them to heavy rain.
Pro Tip: Lay out your entire first dry run before opening any adhesive. It’s far easier to shuffle dry caps into the right pattern than to pry up a glued one.
Finish by checking that front joints sit tight against each other, overhang is consistent (commonly around 3/4 inch to 1 inch where the wall system allows it), and no foot traffic crosses the new caps until the adhesive sets.
Adhesives, durability, and freeze-thaw best practices
Adhesive choice is where a lot of DIY cap jobs go wrong. Rigid mortar bonds caps in a way that cracks when the block below shifts even slightly from frost heave or settling, while flexible, high-molecular-weight polymer adhesives absorb that small movement without snapping the bond.
A common manufacturer-recommended layout uses two continuous 1/4-inch adhesive beads, one near the front edge and one near the back, as outlined in the VERSA-LOK technical bulletin. That spacing spreads the bond across the full cap rather than concentrating it in one spot, which reduces the chance of a corner lifting during a freeze cycle.
A few other details affect durability:
- Apply adhesive only when the substrate is dry and within the temperature range listed on the tube, since cold or wet surfaces weaken the bond.
- Skip rigid cement-based mortar for cap adhesion on segmental walls; it is more prone to cracking than purpose-made flexible adhesives.
- Hold off on sealing caps until you’ve checked manufacturer guidance, since some sealers interact poorly with certain adhesives or stone finishes.
Homeowners in harsh winter climates sometimes add a concrete sealer for extra freeze-thaw protection, a step covered in more detail by resources on sealing for freeze-thaw protection.
How to handle curves, corners, and saw-cutting caps
Straight runs of wall are the easy part. Curves and corners are where most DIY cap jobs either look clean or look obviously homemade.
Manufacturer guidance typically describes an “A” cap and a “B” cap, mirror images of each other, that alternate along a straight wall to keep the front edge tight. For curves, trapezoidal or dual-sided caps are the better choice because their tapered shape follows a convex or concave radius without constant trimming.
- Keep front joints tight and let any gapping happen at the back, where manufacturer guidance generally tolerates up to about 1/2 inch.
- Saw-cut caps with a wet masonry blade when a full piece won’t fit; splitting with a hammer and chisel works for rough, hidden cuts but rarely gives a clean visible edge.
- Avoid leaving a cut piece narrower than about 4 inches at a visible corner. It reads as an obvious patch rather than a planned fit.
Pro Tip: Order a few extra caps before you start a curved section. Running short mid-curve means waiting on a special order while your dry-laid pattern sits exposed to weather.
Estimating cap quantities and a realistic cost picture
Figuring out how many caps to buy starts with a simple multiplier. Manufacturer estimating guidance suggests multiplying the wall’s total lineal footage by roughly 0.86 to get the base cap count, then rounding up, according to the VERSA-LOK technical bulletin. A 40-foot straight wall would need roughly 35 caps before accounting for waste.
Add extra caps on top of the base estimate to account for corners, curves, saw-cut pieces, and potential breakage during handling, especially with heavier natural stone units.
Caps themselves are usually a modest slice of a retaining wall’s total installed cost, with block, base prep, drainage, and labor making up the larger share. For a fuller breakdown of what a project runs in total, see our guide on retaining wall cost. Choosing natural stone caps, ordering a lot of custom cuts, or capping a very short run can all push the per-unit installed price higher than a straightforward precast job on a long, straight wall.
When to hire a pro: structural signs, permit thresholds, and drainage fixes
Capping is cosmetic work on top of a structural system, and it should never be the first step if the wall underneath is in trouble. Watch for these red flags before you buy a single cap:
- A visible bulge or outward lean in the wall face.
- Blocks that have rotated or shifted out of alignment with the course above or below.
- Large or widening cracks running through multiple blocks.
- Water pooling at the base of the wall after rain instead of draining away.
According to MSU’s construction standards for segmental retaining walls, visible structural distress calls for professional evaluation rather than a cosmetic fix. Taller walls, commonly those approaching a 4-foot exposed height, and any wall carrying a surcharge load like a driveway or patio above it typically fall under local permit and engineering requirements; our retaining wall height limit guide covers how those thresholds usually work.
Behind-wall drainage, perforated pipe, roughly 12 inches of clean crushed stone, and a geotextile fabric barrier, is what actually relieves hydrostatic pressure. Our retaining wall drainage guide explains why capping a wall with failed drainage only hides the problem temporarily. For a closer look at what distress signs mean and what repairs they usually require, see our retaining wall failure guide.
Before setting a single cap, a thorough inspection of the top course for alignment, cracking or rocking blocks, drainage effectiveness, base compaction, and any nearby surcharge load like a patio slab or driveway is necessary.
When a wall needs work before it’s ready to cap, common fixes may include improving or rebuilding behind-wall drainage, realigning or replacing a settled top course, and coordinating with an engineer on taller walls that carry load above code thresholds. Obtaining a site measurement, cap count and material recommendation, adhesive specification, and a written estimate is advisable for comparison against other bids.
Author perspective from Abraham: safe DIY limits and recommended next steps
Most capping mistakes come from skipping the dry-lay step or gluing before checking drainage. DIY is reasonable for a stable, low wall with no visible distress. Beyond that, lean on manufacturer guidance, inspect before you glue, and request a professional look at anything showing movement.
— Abraham
How Action Fence and Deck can help with your retaining wall
If your wall shows any sign of movement, poor drainage, or you’d rather not handle heavy stone and adhesive work yourself, we handle the full scope: inspecting the existing structure, correcting drainage, realigning or rebuilding courses, and installing cap systems matched to your wall and climate.

A site visit from our crew gives you a clear picture of what is cosmetic versus structural, along with a written estimate covering materials, adhesive, and labor. Request a free quote through our services page and get a straight answer on what your wall actually needs before you buy a single cap.
FAQ
Should you cap a retaining wall?
Yes, in most cases. Capping sheds water off the top course, protects core fill, and gives the wall a finished edge, though it won’t fix an already-failing structure.
How much do retaining wall caps cost?
Caps typically make up a modest portion of a wall’s total installed cost, with block, base prep, and drainage work accounting for more of the budget. Natural stone caps and heavy custom cutting push per-unit costs higher; see our retaining wall cost guide for a fuller breakdown.
How do you cap a retaining wall?
Inspect the top course, dry-lay the caps to check pattern and overhang, then set them with a flexible adhesive in continuous beads, working in small groups and aligning each piece to a string line. Let the adhesive cure fully before foot traffic, following the steps in the VERSA-LOK technical bulletin.
What is the best adhesive to use for retaining wall caps?
Flexible, high-molecular-weight polymer adhesives are the standard recommendation because they resist shear and movement better than rigid mortar. Manufacturer guidance commonly calls for two continuous 1/4-inch beads, one toward the front and one toward the back of each cap.
Sources
- VERSA-LOK technical bulletin — caps installation guidelines
- MSU segmental concrete retaining wall construction standards