
A properly built timber retaining wall is a practical, cost-effective choice for low-to-moderate wall heights. DIY construction works well up to about 4 feet when you use ground-contact treated lumber and real drainage, while taller or complex sites call for an engineer or a licensed contractor. Measure your slope, check local permit limits, and if the project looks bigger than a weekend job, get a free quote before you dig.
TL;DR:
- For grade changes under 2 feet, a single tier suits garden edges; steeper slopes benefit from terraces that distribute the load across shorter walls.
- Use roughly 3/4 inch crushed stone behind the wall, wrap it in filter fabric, and slope a 4 inch perforated pipe to an outlet.
- Choose ground contact treated lumber, seal every fresh cut with preservative, and use hot dipped galvanized or stainless fasteners to resist corrosion.
- Get professional review for walls approaching 3 to 4 feet, or sites with groundwater, heavy clay, nearby structures, driveways, or property lines.
- A properly drained pressure treated timber wall commonly lasts 20 to 40 years; inspect annually for movement and clear the drain outlet after heavy rain.
Table of Contents
- Design ideas and layout options for a timber retaining wall
- Selecting timber, hardware, and preservative treatments
- Building a small timber retaining wall step by step
- Drainage design that prevents hydrostatic failure
- When to bring in an engineer or a permit office
- Maintenance and realistic lifespan expectations
- Field lessons from building timber walls for 20+ years
- Balancing DIY ambition with professional judgment
- Get a timber retaining wall built right the first time
- FAQ
- Sources
Design ideas and layout options for a timber retaining wall
The right layout depends on how much elevation change you’re managing and how much space you have to work with. A single-course wall, really just one tier of stacked timbers, suits grade changes under 2 feet and works well along a garden bed or walkway edge. For taller slopes, terraced or stepped designs spread the load across multiple shorter walls instead of one tall one, which reduces the engineering demands on any single tier.
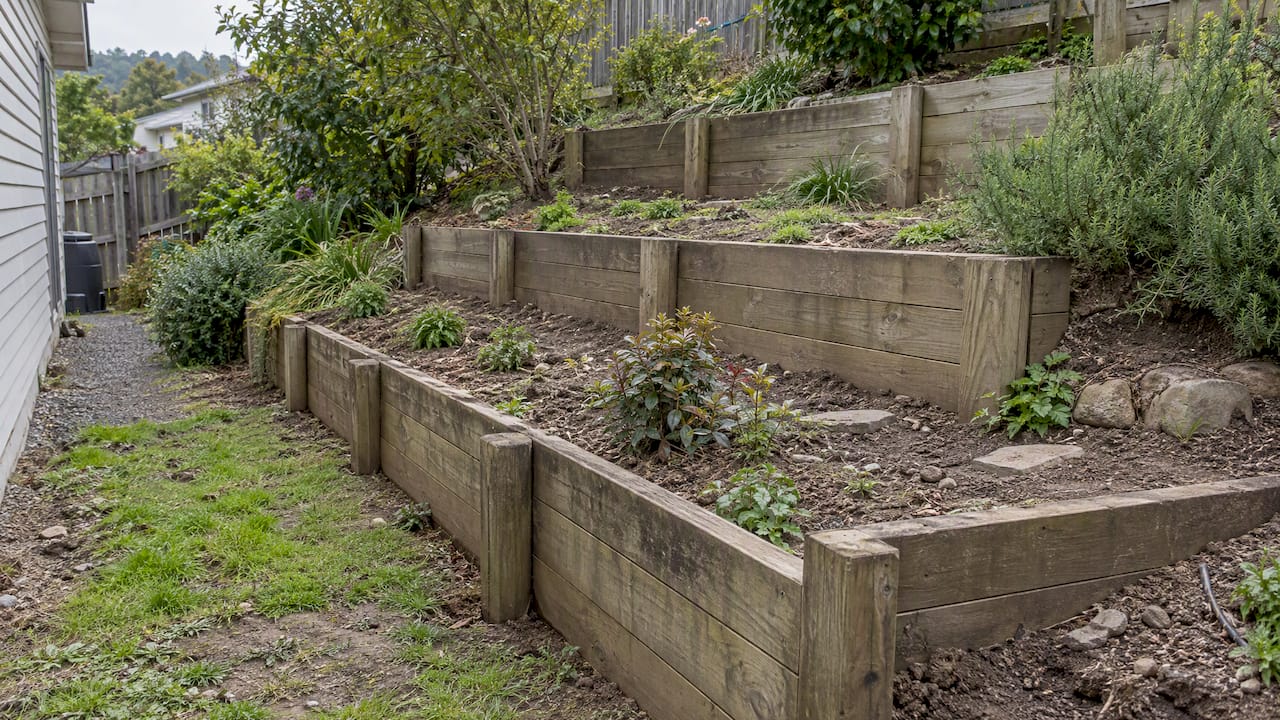
Span and slope steepness drive both layout and cost. A long wall on a gentle grade needs less lumber per linear foot than a short, steep retrofit, but steep sites often require more excavation and a wider drainage zone behind the wall. Adjacent landscaping, patios, or steps also shape the design: a wall that doubles as a planter bed border needs a different cap detail than one that transitions into a stairway.
Common sizing: 4×4 or 6×6 timbers for short garden walls under 2 feet, and 6×6 or larger for anything approaching 3 to 4 feet. Finishing touches matter too.
- Timber caps protect end grain and give the wall a finished look, as covered in our tested cap options.
- Semi-transparent stains extend the life of exposed faces without hiding the wood grain.
- Planting pockets built into stepped designs soften the look and manage runoff at the same time.
- Tying the wall into adjacent steps or a patio edge creates a more finished, cohesive yard.
Selecting timber, hardware, and preservative treatments
Any timber touching soil needs to be rated for ground contact. Pressure-treated lumber rated under the Use Category System is designed for this exposure, and choosing the wrong category is one of the fastest ways to shorten a wall’s life, according to guidance from the Forest Products Laboratory.
- 6×6 timbers work well as vertical posts or deadman anchors in most residential walls.
- 2×8 or 2×12 treated boards are common for face timbers on shorter walls.
- Heavier solid timbers (6×6 and up) handle taller walls better than stacked dimensional lumber.
- Hot-dipped galvanized or stainless fasteners resist corrosion against treated wood; standard zinc-coated screws corrode faster.
Field standard: cut ends should always be sealed with an EPA-registered preservative before installation, since factory treatment doesn’t penetrate a fresh cut, a detail confirmed in Forest Products Laboratory research on preservative treatment and decay resistance. As a rough estimate, a 20 foot wall at 3 feet tall typically needs somewhere between 15 and 25 treated timbers depending on course height and board size.
Building a small timber retaining wall step by step
A small DIY wall follows a predictable sequence, and skipping a step is usually where problems start.
- Plan and measure your wall’s length and height, confirm property lines, and check whether your local permit threshold applies before you dig.
- Excavate a trench and compact a crushed-stone base several inches deep to give the first course a stable, well-drained footing.
- Set the first course level, since every course above it follows this line, and anchor it with rebar driven through pre-drilled holes.
- Stack subsequent courses, staggering joints like brickwork, pre-drilling to avoid splitting, and spiking each course to the one below.
- Check level and plumb every course, not just at the end, because small errors compound as the wall rises.
- Install deadmen or tieback timbers extending back into the backfill for any wall approaching 3 to 4 feet, a method detailed in Family Handyman’s braced-stanchion design.
- Backfill in lifts with crushed stone, compacting each layer, then wrap the stone zone in filter fabric and run a perforated drain pipe to an outlet.
Pro Tip: Dry-fit your first two courses before fastening anything permanently, since a small out-of-level error here is painful to correct once the wall is spiked together.
Both This Old House and Family Handyman recommend capping unengineered timber walls at roughly 4 feet for DIY builds, treating cut ends before backfilling, and rechecking plumb at every course rather than only at the start and finish.
Drainage design that prevents hydrostatic failure
Hydrostatic pressure, water trapped behind the wall with nowhere to go, is the leading cause of retaining wall failure, not timber decay on its own. A porous crushed-stone zone directly behind the wall combined with a perforated drain pipe gives that water a path out before it builds enough force to push the wall forward.
- Use roughly 3/4 inch clean crushed stone as the drainage backfill, wrapped in filter fabric to keep soil from clogging the stone.
- Run a 4 inch perforated pipe at the base of the stone zone, sloped to daylight or a drainage sump.
- Local guidance from Fairfax County recommends this same crushed stone, fabric, and forced-outlet combination as the field standard for reliability.
- Terraced walls need independent drainage for each tier so water from an upper terrace doesn’t surcharge the one below.
Maintainable conical drains versus simple weep holes: research on maintainable drains for earth retaining structures shows that smaller drains spaced more closely tend to perform more reliably than fewer large ones, with design charts allowing spacing up to 30 feet for larger drain sizes. The same research recommends designing for conservative, high groundwater assumptions rather than average conditions.
When to bring in an engineer or a permit office
Most jurisdictions set a height threshold, often somewhere around 3 to 4 feet, above which a permit and sometimes a stamped engineering plan become mandatory. Beyond height, a few site conditions should push you toward professional help regardless of wall size.
- Walls near a property line, driveway, or building foundation carry higher stakes if something shifts.
- Sites with visible groundwater, spring saturation, or heavy clay soils need lateral earth pressure calculations that go beyond rule-of-thumb sizing.
- Any wall supporting a structure above it, like a deck or a fence, benefits from an engineered review of tieback design.
An engineer or contractor will typically evaluate soil type, groundwater depth, and lateral earth pressure, then size tieback spacing accordingly. When requesting quotes, ask for a drawn plan, a materials list, and a clear scope for drainage work, not just a lump sum.
Maintenance and realistic lifespan expectations
A well-drained, properly built pressure-treated timber wall commonly lasts in the range of 20 to 40 years, with lifespan heavily dependent on drainage quality rather than timber grade alone, based on treatment and detailing principles outlined in timber bridge design research.
- Check annually for bulging, leaning, or settling along the wall face.
- Confirm the drain outlet is clear and flowing after heavy rain.
- Recoat any exposed cut ends with preservative if the original treatment looks worn.
- Replace a compromised timber promptly rather than waiting for it to affect neighboring courses.
Most annual maintenance, clearing an outlet or recoating a few cut ends, takes well under an hour and costs little beyond a tube of preservative.
Field lessons from building timber walls for 20+ years
Drainage comes first on every retaining wall job we build. The sequence matters: compacted stone base, filter fabric wrapped around the drainage zone, then a maintainable outlet that can be flushed later if sediment builds up.
- Poor base compaction is the most common error we see on failed DIY walls, since an unstable footing lets the whole wall settle unevenly.
- Undersized or mismatched fasteners loosen over time; hot-dipped galvanized hardware holds up far better against treated lumber.
- A buried or forgotten drain outlet defeats the whole drainage system, so we always leave it accessible for cleanout.
For deeper reading on these failure patterns, see our guides to retaining wall failure causes, terraced wall drainage, and tested retaining wall caps.
Balancing DIY ambition with professional judgment
Small timber walls make genuinely good DIY projects if you respect drainage and anchoring as non-negotiable steps, not finishing touches. Taller or wetter sites deserve a professional look before you commit a weekend and a truckload of lumber to them.
— Abraham
Get a timber retaining wall built right the first time
We design and build timber retaining walls with the drainage detail and anchoring that keep them standing for decades, handling everything from site evaluation to permitting paperwork on taller or more complex slopes.

With extensive experience building outdoor structures and a focus on sustainable materials, we size the job to your site rather than a generic template. If your project crosses the DIY threshold or you’d simply rather hand it off, request a free quote and we’ll walk the site with you.
FAQ
How long will a timber retaining wall last?
A properly drained, pressure-treated timber wall commonly lasts between 20 and 40 years, with drainage quality being the biggest factor in how long it holds up, based on treatment and detailing guidance from timber design research. Poor drainage or skipped preservative on cut ends can shorten that range considerably.
What is the 1/3 rule for retaining walls?
The 1/3 rule is a rough design guideline where a wall’s embedded or buried portion, along with any tieback or deadman length, should be roughly proportional to its exposed height to resist lateral soil pressure. It’s a simplified rule of thumb, not an engineering calculation, so taller walls still benefit from a proper lateral earth pressure review.
What is the best timber to use for a retaining wall?
Pressure-treated lumber rated for ground contact under the Use Category System is the standard choice, since untreated or above-ground-rated wood decays much faster when buried against soil, according to Forest Products Laboratory guidance. Common sizes range from 6×6 posts for short walls to heavier timbers for anything approaching 4 feet.
Is wood the cheapest retaining wall material?
Timber is often one of the more affordable retaining wall materials for low-to-moderate heights, largely because it’s lighter to handle and faster to install than concrete or stone. Final cost still depends on wall height, site access, and drainage work, so our cost guide breaks down realistic ranges by project type.
What drainage do timber retaining walls need?
Timber walls need a crushed-stone backfill zone wrapped in filter fabric with a perforated drain pipe sloped to an outlet, since hydrostatic pressure from trapped water is the leading cause of wall failure. Research on maintainable drains shows that smaller, more closely spaced drains tend to stay reliable longer than fewer large ones.
Sources
- Step by Step Guide to Building a Timber Retaining Wall – This Old House
- How to Build a Treated Wood Retaining Wall (DIY) | Family Handyman
- Design of Maintainable Drains for Earth Retaining Structures Final Report and Design Guide
- Forest Products Laboratory: Chapter on preservatives and pressure-treated wood
- Timber Bridges (technical publication)