
Yes, you can put a pergola on a deck if the existing framing can carry the added weight, the posts anchor into structural joists rather than just the decking boards, and your local permit rules allow the size and attachment you’re planning. If any of those three conditions fails, bring in a contractor or structural engineer before you drill a single hole. If you’re unsure where your deck stands, a deck safety inspection will settle the question fast.
TL;DR:
- Most decks can support a pergola if joist size, spacing, and framing condition meet structural standards, with a focus on joist spacing under 16 inches on center.
- Ground-footed pergolas are preferable for older or heavier structures, while deck-mounted options suit lightweight kits on newer, well-constructed decks.
- Installing a pergola correctly requires locating joists, adding blocking if necessary, and anchoring posts with lag screws directly into framing; never attach posts solely to decking boards.
- Solid roofs or heavy louvered systems significantly increase load and may require switching to ground footings or structural reinforcement, especially in areas with snow or high wind.
- Permits are usually necessary when attaching a pergola to the house or exceeding specific size thresholds, with inspections focusing on framing capacity and correct post-to-footing connections.
Table of Contents
- Deck-mounted vs ground-footed pergolas: which fits your project
- Can your existing deck carry a pergola? Structural checks that matter
- Step-by-step: how to mount a pergola to an existing deck
- Load, wind, and snow: what a pergola adds to your deck
- Materials, pergola types, and 2026 cost ranges
- Permits, code triggers, and checking your local requirements
- Build order and the DIY vs contractor decision checklist
- Why trust Action Fence and Deck: experience, inspections, and permit help
- A builder’s honest take on durability versus looks
- How we can help you build it right
- FAQ
- Sources
Deck-mounted vs ground-footed pergolas: which fits your project
The first real decision isn’t material or style, it’s where the weight goes. A deck-mounted pergola sends its load through posts bolted to the deck’s existing joists and rim, relying on the deck’s own footings to carry everything. A ground-footed pergola skips the deck entirely: posts run alongside or through the decking to independent concrete footings set below frost line, so the deck framing never feels the load.
Deck-mounted setups work well for lightweight aluminum or vinyl kits, decks built within the last decade to current span tables, and structures that sit fully within the deck’s footprint without extending over a cantilever. Ground-footed setups make more sense for heavy custom cedar or redwood builds, decks more than 15 to 20 years old, or any pergola attached to the house where added lateral load needs its own path to the ground.
- Deck-mounted: faster to build, lower cost, but limited by the deck’s original design load and harder to permit if the deck wasn’t engineered for extra weight.
- Ground-footed: higher upfront cost and more digging, but it adds no load to the deck and tends to outlast the deck’s own lifespan.
- Hybrid approach: some builders anchor front posts to the deck and set rear posts on ground footings where the structure meets a taller fascia or slope.
An older deck with any sag, a deck attached to the house with a ledger board, or a design with a solid roof almost always points toward ground footings. A new deck under a lightweight louvered or open-lattice kit is usually fine mounted directly to the frame.
Can your existing deck carry a pergola? Structural checks that matter
Before you buy lumber, get under the deck with a flashlight. Look at joist size and spacing first: most residential decks use 2×8 or 2×10 joists spaced 16 inches on center, and anything wider than that spacing, or joists that look undersized for the span, is a warning sign. Check the rim joist and any ledger board attached to the house for rot, rust streaks, or loose fasteners, and look for visible sag between the posts, which usually means the framing is already working harder than it should.
The DCA-6 prescriptive deck guide sets out the decking, joist span, and rim and ledger attachment requirements builders use as a baseline for whether a deck’s framing matches its size and load. Comparing your actual joist spans against those tables tells you quickly whether you’re within normal limits or pushing past what the framing was designed for, particularly on any cantilevered overhang where a pergola post might land.
- Red flag: joist spacing wider than 16 inches on center for the joist size you have.
- Red flag: visible sag, bounce, or soft spots anywhere near the planned post locations.
- Red flag: framing older than 15 to 20 years with no record of upgrades or inspections.
- Red flag: plans for a solid roof or heavy louvered system, which adds far more dead weight than an open lattice.
Pro Tip: Walk the deck’s perimeter and press a screwdriver into any suspect rim joist or ledger. If it sinks in easily, that wood is compromised and needs replacement before you anchor anything to it.
Step-by-step: how to mount a pergola to an existing deck
Build order matters more than most homeowners expect. If the deck frame goes in first and the pergola posts go in second, you know exactly where every joist sits and can plan post locations around them instead of guessing. Skipping this order, or trying to retrofit posts into a finished deck without locating the framing underneath, is the most common reason DIY pergolas loosen within a year or two.
Here’s the sequence that avoids rework:
- Locate the joists. Use a stud finder rated for decking, or pull a few boards near the planned post locations to confirm exact joist positions.
- Add blocking where needed. If a post location falls between joists, install a cross blocking member so the post lands on solid framing rather than thin air.
- Set post base brackets. Choose brackets rated for exterior use and sized for your post dimension, positioned directly over the joist or blocking.
- Drill through the decking. Mark and drill clean pilot holes through the decking boards into the joist or rim below, checking for level and square before committing.
- Install the lag screws. Two 1/2 inch by 6 inch galvanized lag screws with washers per post, driven into the joist or rim, is the standard minimum for securing a post base bracket.
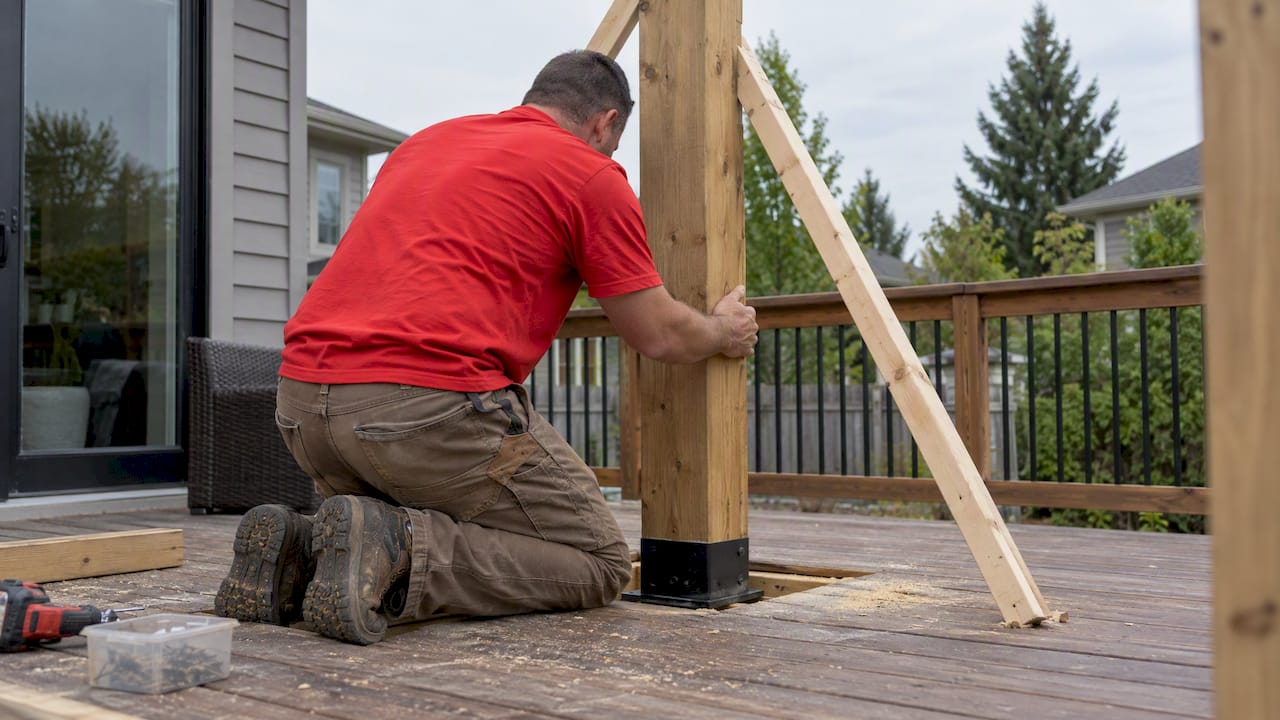
- Set and plumb the posts. Brace each post temporarily while you check plumb in both directions, then tighten the bracket hardware fully.
- Assemble the rafters. Space main rafters and cross-members 16 to 24 inches on center depending on your material and span, matching your design load.
- Finish the structure. Add any decorative trim, stain or seal exposed wood, and do a final check of every bolted connection.
Securing posts with two 1/2 inch by 6 inch galvanized lag screws per post into structural framing is a commonly recommended minimum for pergola attachment, according to practical installation guidance from builders, and it underlines why anchoring into surface decking alone never holds up under wind load.
If you’re working on decking that’s already finished and stained, cut your access holes carefully and plan to patch or trim around the post base afterward rather than drilling blind. Temporary braces, even simple 2x4s screwed at an angle, keep posts plumb while you work alone and make the lag screw installation far easier to get square. Whatever you do, never anchor a post base to the decking boards by themselves: decking is a wear surface, not structure, and screws into decking alone will work loose under the first strong gust.
Load, wind, and snow: what a pergola adds to your deck
A pergola adds two distinct kinds of load to a deck. Dead load is simply the weight of the structure itself: posts, beams, rafters, and any roofing material. Live load covers everything variable: wind pushing against the structure, snow piling on a solid or louvered roof, and anything you hang from the rafters later, like string lights or a porch swing. Both loads eventually travel down through the posts into the deck’s joists and footings, so a structure that looks light on paper can still overload an undersized frame once wind pressure is factored in.
A solid roof or heavy louvered system changes the math substantially. Once a pergola has a solid cover, it behaves structurally like a patio cover rather than an open shade structure, which increases both the dead load on the posts and the wind load pushing against the whole assembly. That shift is also why many jurisdictions treat solid-roofed structures differently for permitting, since the design loads look more like an attached room than a simple shade frame.
- Spread post bases across beams rather than a single joist when the design allows it, to distribute weight more evenly.
- Add sister joists or blocking under any post location carrying above-average load, especially near a solid roof section.
- Switch to ground footings any time calculated loads come close to or exceed what the existing deck framing was designed to carry.
Materials, pergola types, and 2026 cost ranges
Material choice drives both weight and upkeep. Pressure-treated lumber is the least expensive option and holds up well outdoors, but it needs periodic sealing and can warp if it dries unevenly. Cedar and redwood cost more upfront, resist rot and insects naturally, and weather to an attractive gray if left unsealed, though both still benefit from occasional staining in wetter climates. Aluminum is the lightest option by far, needs almost no maintenance, and is often the easiest material to mount directly to an existing deck without extra reinforcement, especially when considering a corrosion proof pergola over a pool deck.
Pergola type matters just as much as material. An open-lattice design lets rain and sun through and adds the least weight to your deck. A louvered system, whether fixed or motorized, adds moving parts and more dead load, and often needs sturdier posts and footings. A solid roof blocks weather completely but behaves like a patio cover structurally, with the highest weight and the most likely permit requirement.
- Pressure-treated lumber kits: lowest material cost, moderate maintenance, widely available.
- Cedar or redwood custom builds: higher material and labor cost, better natural weather resistance, more design flexibility.
- Aluminum kits: lightest weight, lowest long-term maintenance, often the simplest retrofit onto an existing deck.
Total project costs for 2026 vary widely depending on scope. Basic deck-plus-pergola kit combinations start around $3,000, while composite decking paired with a custom cedar or redwood pergola can run $18,000 or more, with labor, permits, and any structural reinforcement work accounting for most of that spread. Louvered systems in particular can push costs much higher depending on size and automation, so get a firm quote before assuming a kit price covers your whole project.
Permits, code triggers, and checking your local requirements
Permit rules vary by jurisdiction, but a few triggers come up consistently. Attaching a pergola to the house, rather than building it freestanding, almost always draws permit attention because it affects the home’s structure. A solid roof typically pushes a project into patio-cover territory for code purposes. And size matters: many jurisdictions use a rough threshold around 120 to 200 square feet as the point where a permit becomes mandatory, though the exact number depends entirely on your local building department.
Before you call anyone, gather your planned square footage, sketch where posts and footings will sit, and note any structural changes you’re making to the deck itself, like added blocking or sintered joists. Inspectors typically want to see post-to-footing details and any engineering notes if you’re reinforcing existing framing rather than building new.
- Call your local building department first, since permit thresholds and attachment rules differ by city and county.
- Bring photos and measurements of the existing deck framing to speed up any inspection or permit review.
- Use a permit guidance resource like our deck building permits overview to understand what’s typically asked for before you file.
Build order and the DIY vs contractor decision checklist
The sequence that avoids rework is straightforward: verify the framing, mark post locations, add any blocking needed, confirm or finish the decking, anchor the posts, then assemble the pergola on top. Doing it in a different order usually means pulling boards back up later to fix a post that landed on the wrong joist.
- Verify framing capacity against span tables and visible condition before buying any materials.
- Mark exact post locations relative to known joist positions, adjusting the layout if a post would land between joists.
- Add blocking or sistered joists wherever the framing needs reinforcement to carry the new load.
- Confirm the decking is sound and properly fastened before drilling through it for post anchors.
- Anchor the posts with lag screws into joists or rim, checking plumb and tightening fully.
- Assemble the pergola structure once every post is secure and verified.
Hire a professional when joist capacity is uncertain, when the design calls for engineered footings or a ledger attachment to the house, or when local permit requirements involve structural drawings you’re not equipped to produce. A good contractor will walk the deck with you, point out any framing concerns before quoting, and explain exactly how posts will anchor and what hardware they’re using.
Pro Tip: Ask any contractor you’re quoting what hardware they use for post anchors and how they’ll confirm joist locations before drilling. A vague answer is a sign to keep shopping.
Why trust Action Fence and Deck: experience, inspections, and permit help
We have extensive experience building and inspecting decks and outdoor structures, and our builders hold the appropriate licenses and insurance for this kind of structural work. When a homeowner isn’t sure whether their deck can carry a pergola, we recommend starting with a deck safety inspection that checks joist condition, spacing, and attachment points before any construction talk begins.
From there, we can assist with permit paperwork, design engineered footings when a deck’s framing can’t take the extra load, and build custom pergolas suited to the deck and the climate. Free quotes are typically provided when you bring photos of the existing deck, any available plans, and rough dimensions of the pergola footprint you are considering, to get an accurate read on scope and cost.
A builder’s honest take on durability versus looks
Given the choice, we lean toward ground footings on anything heavier than a basic aluminum kit, since it removes the deck’s age and condition from the long-term equation entirely. In wetter climates we favor cedar or pressure-treated lumber with a good seal; in drier regions, redwood ages beautifully with less upkeep. Sustainability and good craftsmanship aren’t competing goals here, they come from using the right material for the site rather than the cheapest one available.
— Abraham
How we can help you build it right
We provide a range of services including deck safety inspections to confirm framing capacity, permit assistance for relevant jurisdictions, and custom pergola construction with engineered footings when necessary. A free quote typically covers a rough timeline, on-site measurements, and a realistic cost band for your specific deck and design.

- Deck safety inspection to confirm joist and framing condition before any work starts.
- Permit assistance so you know exactly what your local department requires.
- Custom pergola builds matched to your deck’s structure and your climate.
Visit our decks page or browse our full services overview to request a free quote and get a straight answer on what your deck can handle.
FAQ
Can you put a pergola on your deck?
Yes, as long as the deck’s framing can handle the added weight and the posts anchor into structural joists rather than the decking surface alone. A quick inspection of joist spacing, condition, and any sag tells you whether your deck is a good candidate or needs ground footings instead.
What is the purpose of a pergola on a deck?
A pergola adds partial shade and defines an outdoor living space without fully enclosing it, which keeps the deck usable on hot days while still letting light and air through. Many homeowners also use one to support string lights, climbing vines, or a retractable canopy for adjustable shade.
Is a pergola too heavy for a deck?
It depends on the pergola type and the deck’s existing framing: an open-lattice kit in aluminum or lightweight wood is rarely a problem for a healthy deck, but a solid-roofed or heavy louvered system can exceed what older or undersized framing was built to carry. Builders generally recommend ground footings when the structure’s weight is in doubt rather than risking the deck’s own framing.
Can I put a gazebo on top of my deck?
A gazebo can sit on a deck under similar conditions to a pergola: the framing needs to support the added dead load, and posts should anchor into joists or blocking rather than just the decking boards. Because gazebos typically have a solid roof, they add more weight and are more likely to require a permit than an open pergola.