
The fastest way to make a deck feel finished is to combine four moves at once: layer plants by height, add a drainage edge, drop in a few containers for instant color, and screen one problem view. Do those together and a deck stops looking like a plywood island in a lawn. Everything else, from plant lists by light exposure to the exact planting steps, builds on that core combo.
TL;DR:
- Properly layered plants from low to tall, with a bed width of 3 to 5 feet, create depth and avoid a flat appearance around the deck.
- Matching plant choices to the microclimate based on sun exposure and soil drainage ensures survival and reduces maintenance.
- Installing a gravel or stone strip at least 12 inches wide along the deck edge minimizes mud splash and enhances drainage.
- Evergreen shrubs like Emerald Green arborvitae offer year-round privacy but require planning for mature size and spacing.
- Address drainage and soil compaction issues before planting to prevent structural damage and ensure healthy root growth.
Table of Contents
- How Do You Landscape Around a Deck?
- Which Plants Work Best Around a Deck by Light and Moisture?
- What Do You Put Between a Deck and the Lawn?
- What Are the Best Privacy Screening Options for a Deck?
- How Can Containers and Vertical Planting Stretch a Small Deck?
- How Should You Light a Deck and Its Landscaping?
- How Do You Handle Slopes and Drainage Near a Deck?
- Weekend Planting Checklist: From Bare Yard to Planted Bed
- How Do You Keep Deck Landscaping Low Maintenance?
- What Soil Prep Does Deck-Adjacent Ground Actually Need?
- How Do You Add Irrigation to Deck Landscaping?
- Does Your Deck Material Affect Nearby Landscaping Choices?
- What Homeowners Get Wrong About Deck Landscaping
- Trade-Proven Tips Before You Plant Near Your Deck
- Ready to Build the Structure Your Landscaping Deserves
- Sources
- FAQ
How Do You Landscape Around a Deck?
Start with the frame, not the flowers. A soft-frame approach, where low plants hug the deck edge and taller ones rise behind them, does more to visually anchor a deck than any single showpiece plant ever will.
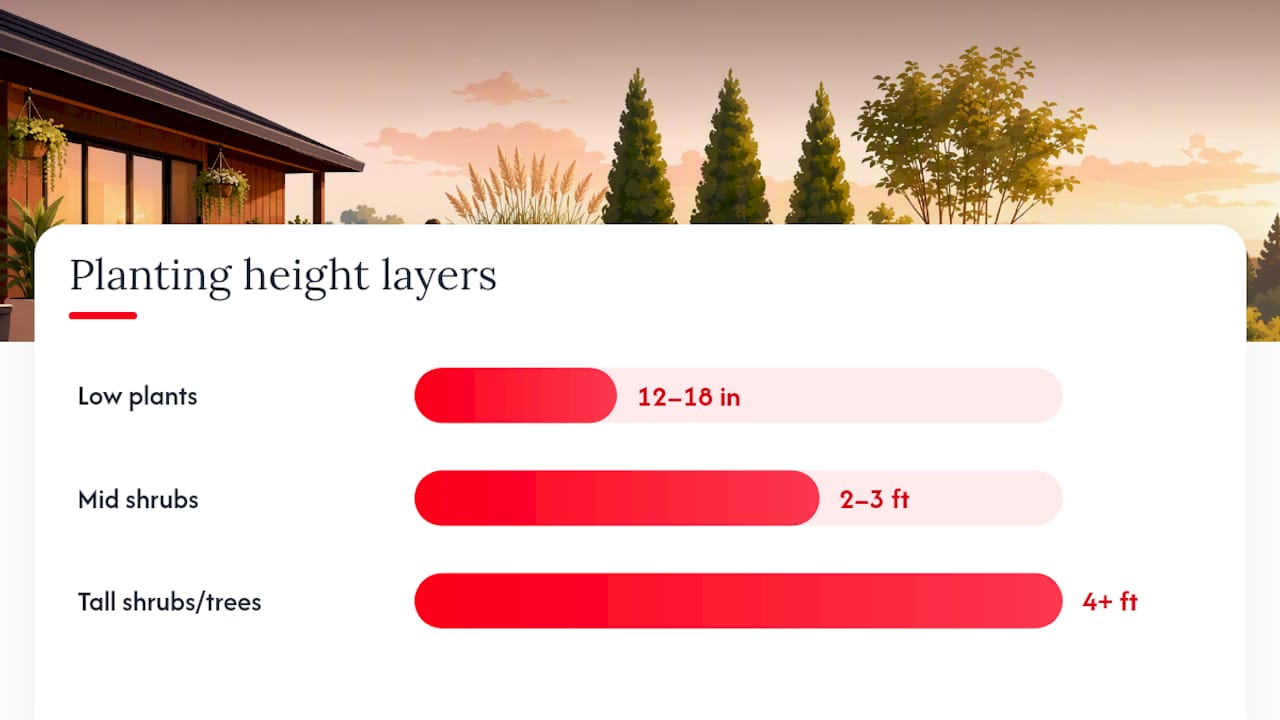
The layering formula is simple: low plants in front (12 to 18 inches), mid-height shrubs or perennials in the middle (2 to 3 feet), and taller shrubs or small trees at the back (4 feet and up). This front-to-back rhythm creates depth instead of a flat green wall, and it’s the same principle landscape designers use to keep beds from looking like a single row of plants stapled to the siding.
Bed width matters more than most homeowners expect. Anything under 2 feet forces single-file planting and looks thin within a season. Aim for 3 to 5 feet of bed width wherever you can, which is enough room to layer plants properly without them crowding each other out by year two. Curve the bed’s outer edge rather than running it dead straight. A gentle curve reads as intentional; a straight strip reads as an afterthought.
Match your approach to your actual goal. If you entertain often, keep a mulch or paver path looping from the stairs to a fire pit or grill area, and use plants to frame that path rather than block it. If privacy is the priority, put your tallest plantings where the neighbor’s window lines up, not evenly around the whole perimeter. If low maintenance is what you’re after, favor hardscape (gravel, pavers, stone) over a plant-only bed, since hardscape needs zero watering and no pruning schedule.
Which Plants Work Best Around a Deck by Light and Moisture?
A deck creates its own weather. A south or west-facing deck bakes in the afternoon, drying out soil fast, while a north-facing or heavily shaded deck stays cool and damp well into summer. Sun exposure and drainage conditions determine which plants will actually survive near your specific deck, so match the plant list to the microclimate before you fall for something at the garden center.
For sunny, hot decks (6+ hours direct sun):
- Russian sage, for its silvery texture and drought tolerance once established
- Black-eyed Susan, a reliable bloomer that shrugs off heat waves
- Daylilies, which handle reflected heat off deck boards without wilting
- Ornamental grasses like Karl Foerster feather reed grass, for movement and winter interest
For part-sun spots (3 to 6 hours):
- Hydrangeas, especially panicle types, for big summer color with moderate water needs
- Coral bells (Heuchera), grown for foliage color more than bloom
- Astilbe, which prefers the moisture that part-shade areas tend to hold
For shaded areas under overhangs or tall trees:
- Hostas, the default shade workhorse for good reason
- Ferns, particularly for the cool, damp pocket under a raised deck
- Lungwort (Pulmonaria), an early spring bloomer that tolerates dry shade
For dry, fast-draining sites near a deck’s foundation:
- Sedum and other succulents, which need almost nothing once rooted in
- Lavender, if drainage is genuinely sharp (it rots in soggy soil)
- Yarrow, tough enough for the gravelly strip closest to the framing
For year-round screening rather than seasonal color, Emerald Green arborvitae is the plant most homeowners land on. It typically reaches 10 to 15 feet and holds its green color through winter, which is why it shows up so often in privacy plantings. It’s also a slow, columnar grower, so it won’t sprawl into a deck’s footprint the way a wide shrub might.
What Do You Put Between a Deck and the Lawn?
Nothing kills a clean deck look faster than mud splash and mower scalping right at the edge. A narrow gravel or crushed stone strip, roughly 12 to 18 inches wide, running along the deck’s perimeter reduces splash-back and improves drainage in the exact spot where rain runoff hits hardest.
For the edging itself, a few materials handle the transition well:
- Steel or aluminum edging holds a crisp curved line and barely shows once plants fill in.
- Natural stone or brick costs more but pairs well with a stone-and-timber deck.
- Rubber or plastic edging is the budget option and works fine for straight runs.
- Paver landings at the base of stairs give feet a solid, dry spot to land instead of stepping straight into mulch.
If the deck connects to a grill station, shed, or garden gate, a simple stepping-stone or paver path between those points does more for daily usability than any amount of flower color. Size that gravel strip at least 12 inches wide; anything narrower disappears visually and stops doing its drainage job within a year as mulch and soil creep back over it.
What Are the Best Privacy Screening Options for a Deck?
Privacy solutions split into three real categories, and each comes with a maintenance trade-off worth knowing before you commit a season to it.
- Evergreen hedges (arborvitae, boxwood, holly) give year-round, low-maintenance screening but take two to three years to reach full height and need permanent ground space.
- Trellised vines (clematis, climbing hydrangea, honeysuckle) screen fast and work in tight spots, but most varieties drop their leaves in winter, leaving a bare frame.
- Container bamboo grows fast and screens densely within a single season, but it needs yearly root pruning or division to stay contained in its pot.
- Fence-and-planting combos, where a 4 to 6 foot privacy fence handles the base screening and plants soften the fence line, solve privacy immediately rather than making you wait for a hedge to grow in.
Renters or anyone landscaping under a lease restriction should lean on the container route entirely. A row of large planters with tall grasses or clumping bamboo along a deck rail creates a living screen with zero ground disturbance.
Pro Tip: Space arborvitae plants 3 to 4 feet apart if you want a solid wall within a few years; wider spacing looks sparse for a long time and rarely fills in the way homeowners expect.
How Can Containers and Vertical Planting Stretch a Small Deck?
Ground space runs out fast on a small deck, which is where containers and vertical systems earn their keep. Every pot needs drainage holes and pot feet to lift it off the deck boards, since standing water under a planter stains wood and composite decking alike.
The container formula worth memorizing is thriller, filler, spiller: one tall upright plant in the center or back, a rounded mid-height plant filling the middle, and a trailing plant spilling over the pot’s edge. A canna lily (thriller) with coleus (filler) and sweet potato vine (spiller) is a classic, reliable combination that creates visual balance in a single pot without any design guesswork.
- Wall-mounted planters and pocket systems add green without taking a square inch of floor space.
- Modular planter walls let renters build a privacy screen that comes apart and moves with them.
- Swap containers seasonally: spring bulbs, summer tropicals, fall mums.
- Bring frost-tender containers indoors or against the house before the first hard freeze.
How Should You Light a Deck and Its Landscaping?
Lighting is the cheapest upgrade that changes how much a deck actually gets used. Step lights on stair risers and low path lights along the border solve the safety half of the equation, since most deck falls happen on unlit stairs after dark.
- Step lights, recessed into stair risers, are close to mandatory on any deck with more than two steps.
- Path lights along a bed’s edge mark the transition from deck to lawn so nobody clips a border at night.
- Uplighting, aimed at a specimen shrub or small tree, adds texture and depth after sunset.
- String lights overhead do the mood work but shouldn’t replace functional path lighting.
Keep fixtures low-voltage (12 volt) for anything you install yourself; line-voltage work near a deck’s electrical service should go to a licensed electrician. Aim uplights at plants with strong texture, like ornamental grasses or arborvitae, since flat-leafed plants don’t throw interesting shadows.
How Do You Handle Slopes and Drainage Near a Deck?
Water is the single biggest threat to a deck’s structure, and landscaping decisions near the framing either help or hurt that fight. On a sloped yard, a small retaining edge or a full terrace turns unusable, erosion-prone ground into a plantable zone, and terracing is the standard fix for keeping mulch and soil from washing away in a heavy rain.
- Grade soil so it slopes away from deck posts and footings, never toward them.
- Use a gravel strip at the deck’s base rather than mulch, which holds moisture against the wood.
- Add a shallow swale (a graded dip) to redirect runoff around the deck rather than under it.
- Consider a small rain garden downhill of the deck to soak up runoff before it pools.
- Call a contractor for any retaining wall over 3 to 4 feet, since taller walls often require engineering and permits.
If your yard slopes toward the house, that’s the priority fix before any planting decision, since drainage sloped away from deck footings protects the framing far more than any plant choice does.
Weekend Planting Checklist: From Bare Yard to Planted Bed
Spring and fall are the two best windows to plant, since cooler temperatures reduce transplant stress compared to planting in peak summer heat. Gather your materials before you start: a spade, edging material, landscape fabric or cardboard, mulch, and your plant list sorted by height.
- Mark the bed border with a garden hose or spray paint, keeping the curve gentle and the width at 3 to 5 feet where space allows.
- Remove the turf inside that line, either by cutting sod strips or smothering grass with cardboard two weeks ahead of time.
- Install edging along the marked line, setting steel or plastic edging a few inches into the soil for stability.
- Improve the soil by working in 2 to 3 inches of compost across the bed before anything goes in the ground.
- Lay landscape fabric or cardboard if you’re fighting weeds, cutting holes only where plants will go.
- Place plants while still in their pots, following the low-mid-tall layering formula, and step back to check spacing before digging a single hole.
- Plant and water immediately, setting each plant at the same soil depth it sat at in its nursery pot.
- Mulch 2 to 3 inches deep, keeping mulch pulled back a few inches from stems and away from deck posts.
For the first 6 to 12 weeks, water deeply two to three times a week rather than lightly every day. Watch for wilting in the heat of the afternoon (normal) versus wilting that persists into the evening (a sign the plant needs more water or better drainage).
How Do You Keep Deck Landscaping Low Maintenance?
Established plants need less water than new ones, and knowing when to make that switch saves both time and a water bill. Water new plantings deeply two to three times weekly for the first season, then taper to once a week or less once roots establish, watering deeply rather than often so roots grow down instead of staying shallow.
- Prune spring-blooming shrubs right after flowering; prune summer bloomers in late winter before new growth starts.
- Refresh mulch once a year, typically in spring, topping off to maintain a 2 to 3 inch layer.
- Check container soil moisture more often than ground beds, since pots dry out faster in sun and wind.
- Bring tender container plants indoors before frost, and stop fertilizing everything by early fall so plants can harden off.
- Brown leaf edges usually mean underwatering or too much reflected heat off deck boards; soggy spots mean drainage needs correcting before you plant again in that spot.
- Watch fast spreaders like bamboo or mint for signs they’re pushing past their container or bed edge, and divide or contain them before they take over.
What Soil Prep Does Deck-Adjacent Ground Actually Need?
Soil right next to a deck is often the worst soil in the yard. Construction backfill, compacted subgrade from footings, and years of runoff concentrated in one narrow strip all conspire against healthy roots.
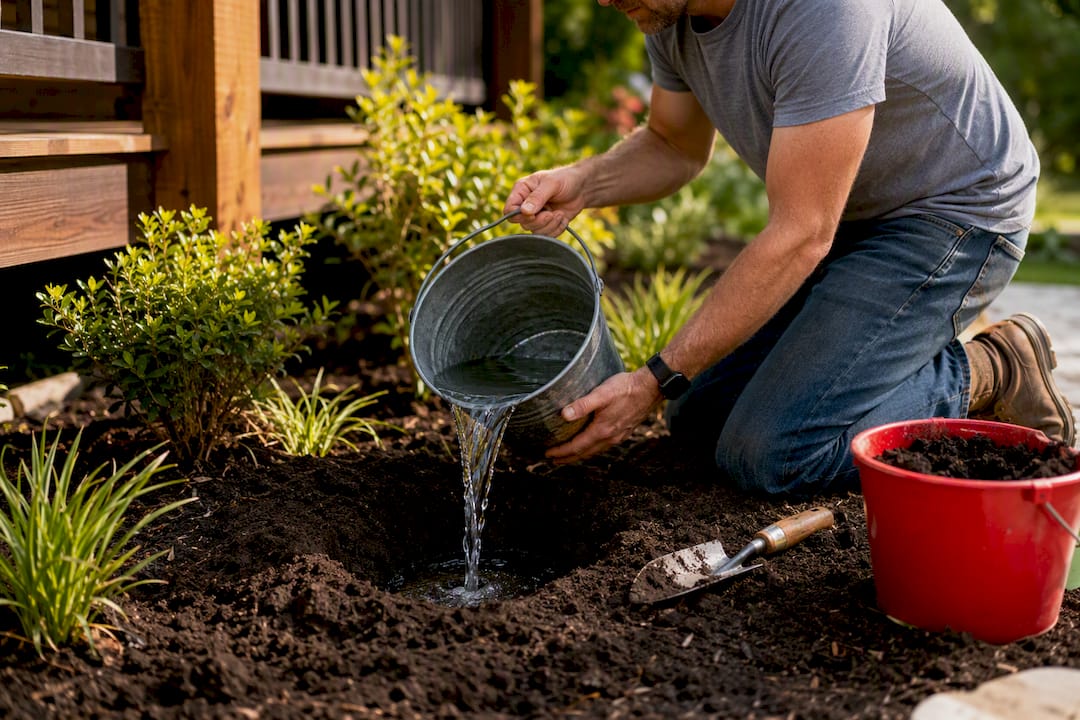
Test drainage before you plant anything: dig a hole 12 inches deep, fill it with water, and see how long it takes to drain. Anything longer than 4 hours signals compacted or clay-heavy soil that needs amending. Work 2 to 3 inches of compost into the top 8 to 10 inches of soil across the whole bed, not just in individual planting holes, since amending only the hole creates a bathtub effect where water pools around roots instead of draining through.
If the soil close to the deck footings feels noticeably denser than soil farther out in the yard, that’s compaction from construction equipment, and it needs a full tilling pass with compost rather than a light topdressing. Raised beds are worth considering in the worst spots. Building a bed 8 to 12 inches above grade with a quality soil mix sidesteps compacted native soil entirely and gives new plantings a clean start.
Avoid piling amended soil directly against deck posts or ledger boards. Keep at least a few inches of clearance so soil moisture doesn’t sit against wood or fasteners longer than it needs to.
How Do You Add Irrigation to Deck Landscaping?
Drip irrigation is the right call for nearly every bed that borders a deck, since it puts water at root level instead of spraying deck boards, railings, or siding. A simple drip line on a battery timer can run the whole planting bed for less than the cost of a few months of manual watering mistakes.
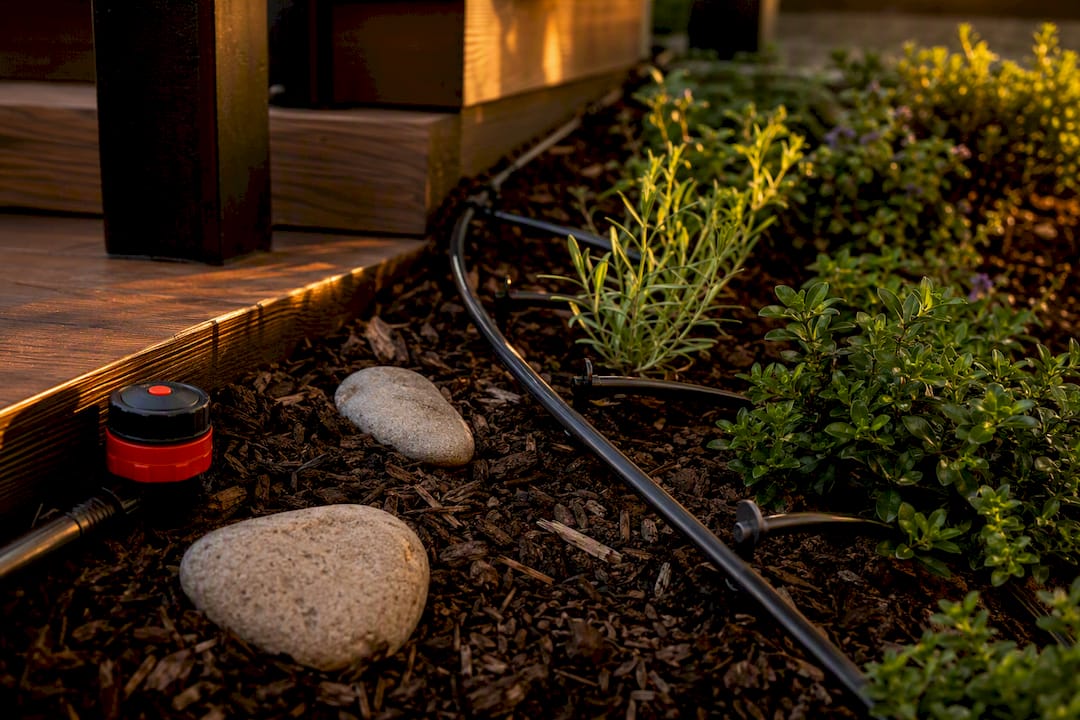
Route irrigation lines along the back of the bed, away from foot traffic near the deck stairs, and stub out drip emitters to each plant’s root zone rather than running one long soaker hose. Containers need their own separate watering plan. Either hand water them or add a dedicated drip line with individual emitters, since ground-bed irrigation rarely delivers enough water to a raised pot.
If your yard doesn’t have an existing irrigation system, a simple hose-end timer with drip tubing handles a deck-adjacent bed just fine for a single season while you decide whether a permanent system is worth the investment. Keep any irrigation line at least a few inches from deck footings and posts, since a slow drip leak against buried hardware causes the same rot risk as poor drainage does.
Does Your Deck Material Affect Nearby Landscaping Choices?
Deck material changes what you can safely plant right up against it. Pressure-treated wood decks tolerate soil contact better than most, but ledger boards and support posts still need clearance from mulch and standing water to avoid rot over time.
Composite decking handles moisture better than wood but still traps heat, meaning plants directly beside a dark-colored composite deck face hotter soil temperatures than the same bed next to a lighter wood deck. Choose heat-tolerant plants for that narrow zone regardless of what’s growing farther out in the bed.
Concrete patios paired with deck areas need less worry about rot but more about staining. Mulch or soil splashed onto light-colored concrete during heavy rain can leave marks that are tough to clean, which is one more reason a gravel strip earns its place at that transition. If pressure washing is part of your regular deck maintenance, keep plantings and mulch a foot or so back from the edge so equipment and cleaning solution don’t drift onto foliage.
What Homeowners Get Wrong About Deck Landscaping
Most guides treat plant selection as the hard part. It isn’t. The plant lists above will work in almost any yard with the right sun exposure. What actually trips people up is sequencing: they plant first and fix drainage later, which means digging up a season’s growth to correct a problem that should have been solved before the first shovel went in the ground.
The second mistake is emotional, not technical. Homeowners buy a 3-gallon arborvitae and plant it 18 inches from the deck rail because that’s how big it looks today. Three years later it’s crowding the railing, blocking a window, and someone’s paying to have it removed. Every plant on a deck-adjacent bed should be sized for its mature width, not its nursery-pot width, and that’s doubly true for anything marketed as a “fast-growing screen.”
The third gap is between what looks good in a photo gallery and what survives an actual yard. A lot of deck landscaping inspiration comes from professionally styled spaces with irrigation systems and a maintenance crew behind the scenes. A homeowner copying that look without matching the water and light conditions ends up disappointed by August. Match the plant to the site first, then chase the aesthetic.
None of this argues against ambition. A well-layered bed with a drainage edge and a couple of container groupings genuinely transforms how a deck feels to use. It just rewards the person who fixes the boring stuff, grading, soil, spacing, before worrying about which perennial photographs best.
— Abraham
Trade-Proven Tips Before You Plant Near Your Deck
After building decks for two decades, the landscaping mistakes that come back to bite homeowners are almost always the same few. Moisture trapped against deck framing rots ledger boards and posts years before the wood should fail, so keep mulch and soil graded away from the structure, never banked up against it.
Bed sizing causes the second most common callback. A shrub planted at mature-width distance from the deck looks sparse for two years and then suddenly needs the deck rail trimmed around it, or worse, needs removal. Measure from the plant tag’s mature spread, not today’s nursery size, when deciding how close to plant to the deck.
Retaining walls and major regrading are where DIY should stop. Anything over a few feet of height change, or any slope actively eroding toward the deck’s footings, calls for a professional who can assess load and drainage properly. If your yard’s grading looks like it’s working against your deck rather than with it, Action Fence and Deck offers free quotes to walk through what a fix actually requires.
Ready to Build the Structure Your Landscaping Deserves
Landscaping only looks as good as the deck it surrounds, and that’s where a lot of DIY plans stall out. Actionfenceanddeck builds the fences, decks, and retaining walls that give your planting beds something solid to frame, without the guesswork of matching materials, grading, or code requirements on your own.

If your privacy screening plan keeps circling back to “maybe a fence instead,” the privacy fence options built to last two decades solve that faster than any hedge will grow in. If a sloped yard is fighting your drainage plans, a properly engineered retaining wall stops the erosion problem before it takes out a season of new plants; check the current retaining wall cost guide for what that project typically runs. Homeowners already planning a deck upgrade alongside their landscaping can also review wood fence pricing before requesting a free quote. Reach out to request a free, no-pressure quote and get guidance on what your yard may need.
Sources
For deeper plant and design inspiration, HGTV’s deck and patio landscaping guide and Better Homes & Gardens’ step-by-step landscaping walkthrough cover design detail beyond this guide’s scope. For next steps on your own property, see deck size planning and under-deck drainage solutions.
- 55 Ideas for Landscaping Around a Deck or Patio
- How to Landscape Around a Deck to Enhance Your Backyard
- How to Landscape Around a Deck (Backyard Upgrade Guide)
FAQ
How Do You Landscape Around a Deck for the Best Results?
Layer plants low to tall from front to back, keep bed width at 3 to 5 feet, add a gravel or stone edge strip for drainage, and match plant choices to the deck’s actual sun exposure rather than a generic list.
What Do You Put Between a Deck and Grass?
A narrow gravel or crushed stone strip, roughly 12 to 18 inches wide, works best between deck and lawn because it reduces mud splash and improves drainage at the exact spot rain hits hardest.
What Is the First Rule of Landscaping Around a Deck?
Match the plant to the site’s light and drainage before anything else. A deck’s sun exposure and moisture level, not personal plant preference, determine what will actually survive there.
What Should You Put Around a Deck for Privacy and Style?
Evergreen shrubs like Emerald Green arborvitae give year-round screening, trellised vines fill in fast for temporary privacy, and a mix of containers with thriller-filler-spiller combinations adds color without needing new ground space.
When Is the Best Time to Plant Around a Deck?
Spring and fall are the best windows, since cooler temperatures reduce transplant stress compared to planting during peak summer heat.