
The most reliable approach to landscaping a slope starts with an honest assessment, then moves to the least invasive fix that stops erosion: bioengineering and plantings where the grade allows, terraces or engineered retaining walls where it does not. Measure the slope, check for drainage problems or recent movement, and treat any cracking, bulging, or fresh seepage as a signal to bring in an engineer or contractor before you plant anything.
TL;DR:
- Proper slope assessment should focus on gradient, soil type, and warning signs before choosing stabilization methods.
- On moderate slopes with good soil, planting with deep-rooted vegetation may suffice, but steeper or unstable grades typically need structural interventions.
- Drainage control is crucial; improper or absent outlet systems often cause wall failures, especially during heavy rain or thaw cycles.
- Combining structural solutions like terraces or retaining walls with plantings and proper drainage creates more durable and cost-effective slopes.
- Engaging a professional for measurements, soil testing, and permit considerations is essential for safe and lasting slope landscaping.
Table of Contents
- How to assess your slope: gradient, soil, and warning signs
- Comparing terraces, hard structures, and soil bioengineering
- Building a planting plan for your slope
- Adding steps, paths, and small rock features safely
- Drainage: the detail most slope projects get wrong
- Maintenance timeline and when to call a pro
- What a contractor checks before quoting a slope project
- What actually matters on a slope, and what gets oversold
- How Action Fence and Deck can help with slope projects
- Sources
- FAQ
How to assess your slope: gradient, soil, and warning signs
Before choosing plants or materials, figure out what you are actually working with. A slope’s steepness, soil type, and drainage pattern decide whether a homeowner can handle the fix or whether it needs a professional.
- Measure the gradient. Stretch a string level between two stakes, measure the drop over a fixed horizontal distance, and convert to a percentage: a rise of 3 feet over 10 feet is a 30% grade. Gentle slopes run under 15%, moderate slopes sit between 15% and 30%, and anything over 30% counts as steep.
- Check the soil. Dig a small hole and note the texture: sandy soil drains fast but erodes easily, clay holds water and can trigger slippage, and loam usually behaves best. Standing water after a percolation test points to poor drainage that needs addressing before planting.
- Read the existing vegetation. Thick, established groundcover suggests a stable slope; bare patches, exposed roots, or thin turf suggest active erosion.
- Watch for red flags. Slumping ground, new cracks in soil or nearby structures, bulging at the base of a slope, or seepage that was not there last season are signs of slope movement that call for an engineer, not a gardening plan.
Gentle and moderate slopes with decent soil usually respond well to planting alone. Steeper grades, unstable soil, or any warning sign above usually need terraces, retaining walls, or an engineered fix layered on top of the vegetation.
Comparing terraces, hard structures, and soil bioengineering
Once you know your slope class, the next decision is which stabilization method fits it. Each option trades off differently on speed, cost, and long-term upkeep.
- Terracing and retaining walls create flat benches that shorten the effective slope length and slow runoff. A widely used rule of thumb is that bench width should roughly equal the height of the lower wall supporting it, and walls run into permitting territory once they climb past about 4 feet, which typically triggers engineering review requirements.
- Hard structures like gabions and riprap offer protection the day they go in, which matters on slopes that are actively failing. They still need periodic inspection for settlement and shifted stone, and pairing them with plantings once the slope settles tends to hold up better over time than rock alone.
- Soil bioengineering uses live plant material as the structural element. Live staking, fascines, and brushlayering work by rooting cut stems and branches directly into the slope face, and they suit moderate grades with workable soil rather than active mass failures. These methods often become more durable over time and can need less upkeep than hard structures once the plants establish, but they require watching over that establishment period.
- Straw wattles, jute matting, and coir blankets buy time. They hold seed and soil in place on the surface while deeper-rooted plants are still developing, and they are the cheapest way to stop surface erosion on a slope you plan to plant later in the season.
Field guidance consistently recommends installing terraces and live fascines from the toe of the slope upward, since a stable lower bench keeps the slopes above it from undercutting as they’re built.
Building a planting plan for your slope
Plant placement on a slope is not just about looks. It follows where water and gravity actually move once the plants take hold.
- Put low-water plants uphill. The top of a slope dries out fastest, so smaller plants with modest water needs belong there, while larger, thirstier plants do better mid-slope and at the base where moisture tends to collect.
- Layer plant types by zone. Fast-spreading herbaceous mixes give you quick surface cover, deep-rooted native grasses hold the middle zone, shrubs anchor the mid-slope, and trees planted near the toe provide the long-term root mass that keeps the whole system in place.
- Match planting method to timeline. Seed is the cheapest option for broad coverage but takes a full season to establish; plugs give faster, more targeted coverage; live staking, cut directly from dormant willow or similar species, roots in place and doubles as an erosion-control structure while it grows.
- Protect new plantings while they root. Mulch holds soil moisture and temperature steady, jute or coir matting keeps seed and soil from washing out during rain, and light irrigation through the first season makes the difference between a plant that survives and one that does not.
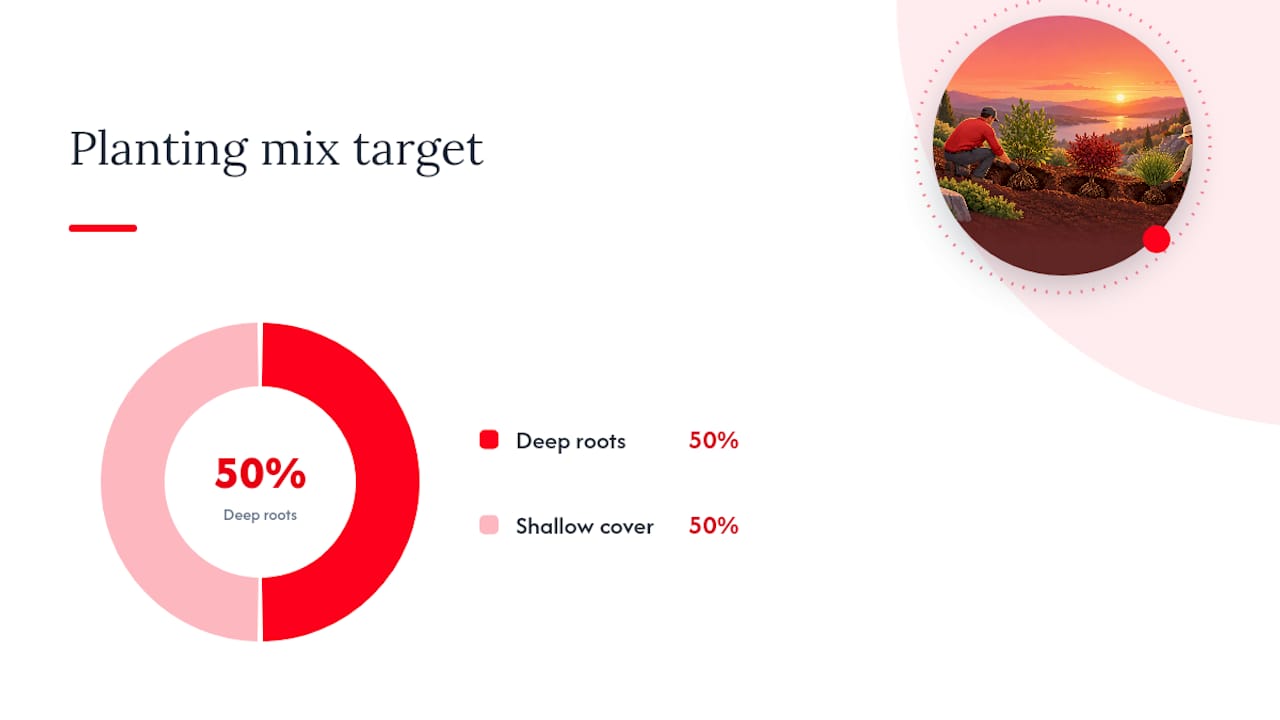
Extension guidance points to a specific target worth building around: aim for roughly 50% deep-rooted vegetation in the overall planting mix, since that’s the threshold most often cited for real slope stability rather than surface appearance alone.
Pro Tip: Plant in fall or early spring when soil moisture is naturally higher, so roots get a full season to establish before summer heat stresses new plantings.
Adding steps, paths, and small rock features safely
Slopes still need to be usable, and that means steps, paths, or a rockery at some point. The trick is adding access without creating a new channel for water to race down.
- Keep risers consistent and runs shallow. Uniform step height reduces trip hazards and erosion around the edges, and switchback paths shed water more gently than a straight run cut directly down the grade.
- Choose permeable materials. Gravel, permeable pavers, or stepping stones set in sand let water soak in rather than sheet off toward a neighbor’s yard or your foundation.
- Use small rockeries for accents, not structure. A low rock border can dress up a planting bed, but it is not a substitute for an engineered wall once you are holding back real soil load; that’s a job for proper retaining wall drainage.
- Protect fresh plantings during construction. Fence off new beds, cover root zones with plywood or mulch during foot traffic, and finish grading last so equipment does not re-compact the soil you just improved.
Drainage: the detail most slope projects get wrong
Saturated soil is the single biggest reason retaining walls and slopes fail, since waterlogged ground adds hydrostatic pressure that a wall was never designed to hold. Getting water off and away from the slope face matters more than almost any other decision in the project.
- Redirect surface water first. Swales and diversion berms placed above the slope keep runoff from ever concentrating on the face, and grading the top of the slope away from the edge stops sheet flow before it starts.
- Build drainage into any wall. A perforated pipe set in drain rock behind the wall, wrapped in geotextile fabric and sloped to a clear outlet, relieves the pressure that causes bulging and collapse.
- Route the outlet somewhere useful. An outlet that dumps water back onto the slope defeats the purpose. Route it to a storm drain, dry well, or a lower point on the property that can handle the flow.
A back-drainage system that lacks a working outlet is one of the most common causes of retaining wall failure, according to Snohomish County’s guidance on wall construction, which is why checking that outlet after every heavy rain matters as much as building it correctly in the first place. Spring thaw is the season to watch closest, since freeze-thaw cycles clog pipes and open new seepage lines that were not there in fall.
Maintenance timeline and when to call a pro
Surface controls like matting and wattles work immediately, but the root reinforcement that actually holds a slope together builds over months to seasons as plants establish. Treat the first year as an establishment period, not a finished project.
- Water new plantings through their first dry season, since even drought-tolerant species need consistent moisture while roots develop.
- Replace failed live stakes and refresh mulch each spring.
- Clear drainage outlets of debris before the rainy season starts.
- Prune shrubs to encourage the branching that thickens root mass over time.
Call a contractor or engineer if you notice ongoing slumping, new cracks, seepage that will not stop, or a wall that has shifted. Any wall over 4 feet or a major regrading job also triggers permitting requirements in most areas, which means a homeowner project has crossed into engineered territory.
What a contractor checks before quoting a slope project
A contractor walking a slope job looks past the plant list to the structural questions underneath it.
- Photos and measurements of the slope, including the steepest section and any existing walls.
- Soil type and groundwater signs, since clay and sandy soils call for different fixes.
- Wall height and outlet location, since both determine whether the job needs an engineer.
- Permit triggers, checked early so the project is not redesigned midway through construction.
A local contractor has built retaining walls and drainage systems on sloped properties for many years with experienced crews, and offers free quotes for homeowners weighing their options.
What actually matters on a slope, and what gets oversold
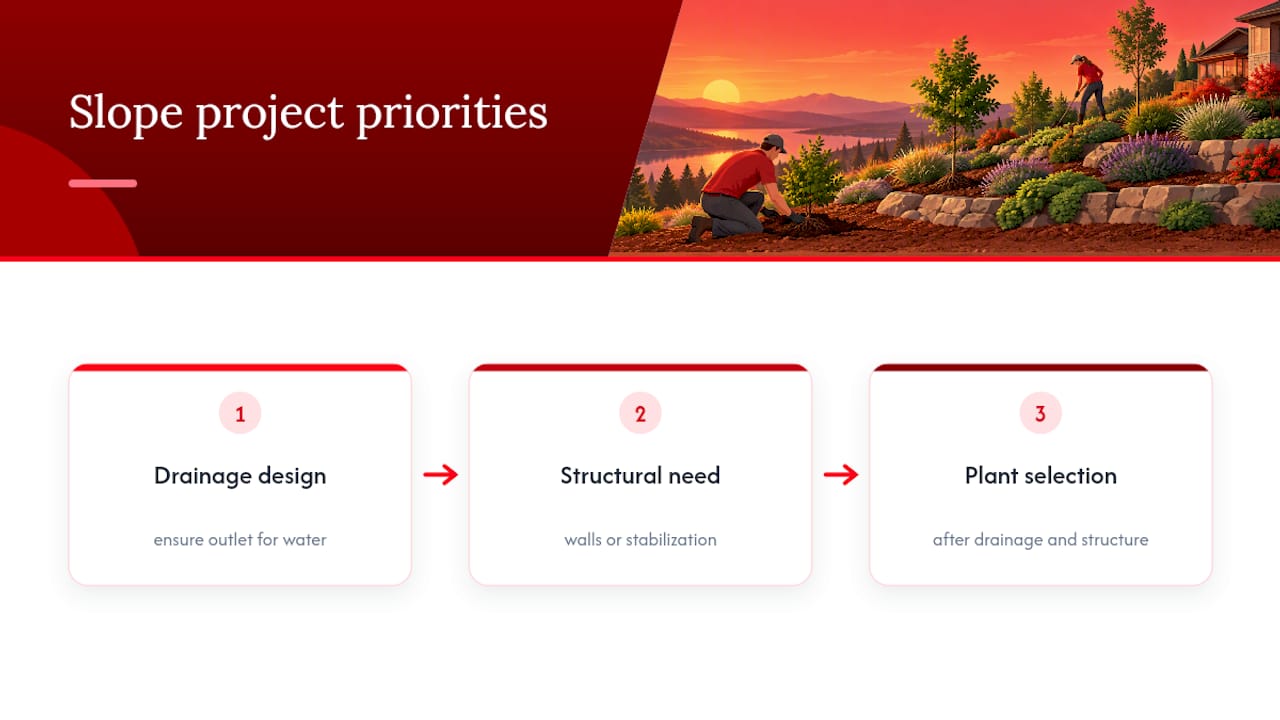
Most slope advice online leans hard into plant lists and skips the part that actually decides whether a project holds up: drainage design. A gorgeous planting scheme on a slope with no outlet for water behind it is a wall failure waiting for the next wet spring. If I had to rank priorities, drainage comes first, structural need second, and plant selection third, even though most homeowners approach it in the reverse order.
The other overrated idea is that bioengineering is always the gentler, better choice. It is often the right one on moderate grades with workable soil, but it provides little immediate structural strength, and treating a genuinely steep or actively slumping slope as a planting project instead of an engineering one is how small problems become expensive ones. The conventional advice undersells how often a hybrid approach, a modest wall with proper drainage plus plantings above and below it, beats an all-plant or all-concrete solution on cost and durability alike.
Start with the assessment, respect the warning signs, and let the slope’s own behavior tell you which fix it actually needs.
— Abraham
How Action Fence and Deck can help with slope projects

Retaining walls, drainage, terracing, and planting-friendly grading are daily work for our crews, and we build them with the back-drainage detail most DIY slope fixes skip. Send us photos, rough measurements, and a short description of the problem, and we’ll put together a free quote for the fix your slope actually needs.
Sources
- Key principles to planting & managing backyard slopes — Master Gardeners
- An alternative for roadside: Soil bioengineering — Forest Service (Iowa State/SDTDC)
- Retaining walls and terracing — Snohomish County
FAQ
What is the best landscaping for a hillside?
The best approach combines the least invasive method that stops erosion on your specific grade: deep-rooted groundcovers and shrubs for moderate slopes, or terraces and retaining walls layered with plantings for steeper ones. Extension guidance recommends placing roughly 50% deep-rooted vegetation in the mix for real stability rather than surface appeal alone.
What are some good landscaping ideas for very steep slopes?
Very steep or unstable slopes usually need structural help first, such as terraced benches or an engineered retaining wall, before plantings can do their job. Soil bioengineering techniques like live staking and brushlayering work well on moderate sections but are not a substitute for structural fixes on slopes already showing signs of movement.
What is the best landscape material for a slope?
There is no single best material: it depends on how fast you need protection and how steep the grade is. Erosion control blankets and coir matting protect the surface immediately while plants establish, hard materials like riprap or gabions offer instant structural protection on failing slopes, and live plant material builds long-term root reinforcement over a season or more.
How can I landscape my backyard with a slope?
Start by measuring the grade and checking soil and drainage, then choose plantings for gentle to moderate slopes or terraces and retaining walls for steeper ones. Any wall taller than about 4 feet typically requires permitting or engineering review, so check that threshold before finalizing a design.