Your best patio extension approach depends on your existing slab: a doweled concrete pour ties in cleanly when the old slab is stable and you want a seamless surface, pavers or gravel work better over shifting soil or tree roots, and an overlay or stain unifies old and new concrete without tearing anything out. Before picking a direction, check whether the existing slab is heaving or cracked and confirm whether your city requires a permit for the footprint or any roof structure you’re planning.
TL;DR:
- A doweled concrete pour is ideal for stable slabs, but if there are cracks or heaving, a repair or full stabilization is necessary before extending.
- Pavers and gravel are flexible, DIY-friendly options that handle ground movement better than rigid concrete and offer more design choices.
- Proper site prep, including grading to slope away from the house and a compacted gravel base, is essential to prevent future cracking and water issues.
- Extending with overlays or matching textures often requires resurfacing the entire patio for a seamless look, especially when color matching aged concrete is difficult.
- Permits are generally not necessary for ground-level extensions, but adding roofs or structures will likely require approval from your local building department.
Table of Contents
- Patio Extension Ideas Grouped by What You Actually Want
- Choosing Materials: Concrete, Pavers, Gravel, or Stone
- Extending Concrete the Right Way: An 8-Step Checklist
- Small-Space and Budget-Friendly Tactics You Can DIY
- Details That Make an Extension Look Built-In
- When a Patio Extension Calls for a Licensed Contractor
- Site Prep, Grading, and the Installation Sequence That Actually Holds Up
- What a Patio Extension Costs and How Long It Takes
- Furnishing the New Space Without Making It Feel Cramped
- Do You Need a Permit to Extend Your Patio?
- Why Buildability Beats Pinterest Boards
- Get a Free Quote for Your Patio Extension
- Sources
- FAQ
Patio Extension Ideas Grouped by What You Actually Want
Most homeowners researching patio extension ideas fall into one of four camps: they want the addition to disappear into the original slab, they want it to look intentionally different, they want shelter from sun and rain, or they want the cheapest possible square footage. Here’s how each goal plays out in practice.
Seamless expansion. A doweled concrete pour is the classic move: steel dowels drilled into the existing slab tie the new pour to the old one, letting both sections move together instead of cracking apart at the joint. If you want a flawless match, resurfacing the whole patio after the extension is often faster than chasing an exact color match on aged concrete.
Design-forward extensions. This is where patio design tips get interesting. Instead of hiding the new section, homeowners are using it as a chance to add texture: a hexagon paver field, a semicircle bump-out for a fire pit, or a curved flagstone border that reads as a deliberate design choice rather than a patch job. Built-in seating walls and raised planters along the new edge do double duty, softening the transition while adding function.
Covered and sheltered additions. A pergola with a canopy top, an attached shed-style roof, or a retractable awning extends usable hours into rain and peak sun. Covered structures are also where permitting gets serious. Anything attached to the house, anything with a roof, or anything that changes drainage patterns typically triggers a review, so check with your local building department before you pour footings. Our deck building permits guide walks through how that process tends to unfold for structures with a roofline.
Budget and DIY-friendly tweaks. Not every patio extension needs concrete. Gravel pads with steel or paver edging are among the fastest, cheapest ways to add usable square footage, and they’re forgiving enough for a weekend project. Stepping pavers set into turf or mulch create an informal path to a seating area without a full hardscape. Modular composite pads snap together over a leveled base for a no-mortar option that still looks finished.
Feature add-ons. Once the extension exists, homeowners often layer in a fire pit pad, a small outdoor kitchen alcove, built-in low-voltage lighting, or a dedicated GFCI outlet for a grill or speaker system. Planning these upgrades before you pour saves you from cutting into finished concrete later.
Pro Tip: Place your new patio’s seam along a natural break, like a planter edge or a step, instead of running it through open pavement. The eye reads a joint at a natural line as a design choice, not a repair.
Choosing Materials: Concrete, Pavers, Gravel, or Stone
Every material trades off cost, durability, and how forgiving it is with ground movement.
- Concrete costs less per square foot than most pavers and gives you a monolithic surface, but matching the color and texture of an aged slab is genuinely hard. An overlay, a thin polymer-modified layer applied over sound existing concrete, is often the cheapest way to visually unify old and new sections without demolition.
- Pavers handle shifting soil and freeze-thaw cycles better than rigid slabs because the individual units flex slightly instead of cracking as one piece. They also open up far more pattern options, though the sand joints need periodic refreshing.
- Flagstone and tile deliver a premium look but run higher in material cost, and some tile products don’t tolerate freeze-thaw climates well.
- Gravel and decomposed granite are the fastest, cheapest options and genuinely DIY-friendly, provided you install proper edging to keep the material contained.
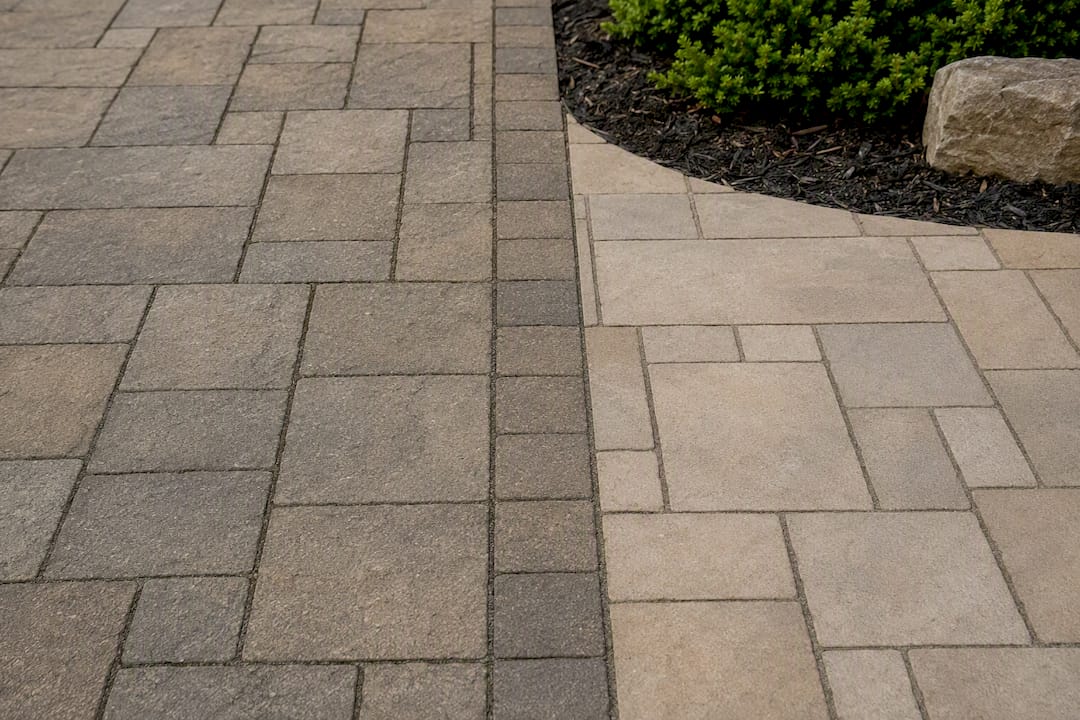
If your goal is a flawless finish, plan on resurfacing the entire patio rather than hoping the new pour matches. If a visible material change fits your design (say, pavers around a concrete core), you can skip that step entirely.
Extending Concrete the Right Way: An 8-Step Checklist
A doweled pour is the right call when your existing slab is flat, structurally sound, and not showing signs of heaving or sinking. It’s the wrong call when the old slab is already moving. Doweling a new pour into a failing slab just locks the crack into a fresh joint instead of solving anything, so a repair or full stabilization needs to happen first.
Once you’ve confirmed the slab is sound, the sequence professionals follow looks like this:
- Inspect the existing slab for cracks, heaving, or drainage pooling.
- Mark the new footprint and layout with stakes and string.
- Call 811 to locate buried utility lines before any digging.
- Excavate to the required depth and remove organic material.
- Install a compacted gravel base, typically 4 to 6 inches of crusher run.
- Drill and set steel dowels into the existing slab, or lay wire mesh/rebar for the new section.
- Pour, screed, and finish the surface to match the existing texture.
- Cure for at least a week before heavy use, keeping the surface damp if temperatures run hot.
One spec matters more than any other: the surface needs to slope away from the house at roughly 1/8 to 1/4 inch per foot. Get that wrong and you’re looking at water pooling against your foundation within a season or two.
Small-Space and Budget-Friendly Tactics You Can DIY
You don’t need a full slab pour to gain real outdoor living space. A semicircle of pavers bumped off an existing patio edge creates a defined seating nook without touching the original concrete. Gravel seating pads bordered by steel or timber edging give you a fire pit zone in a weekend. Stepping stone galleries set through a lawn connect a patio to a garden feature on a shoestring budget. Modular composite pads snap together over a compacted, leveled base for a mortar-free option.
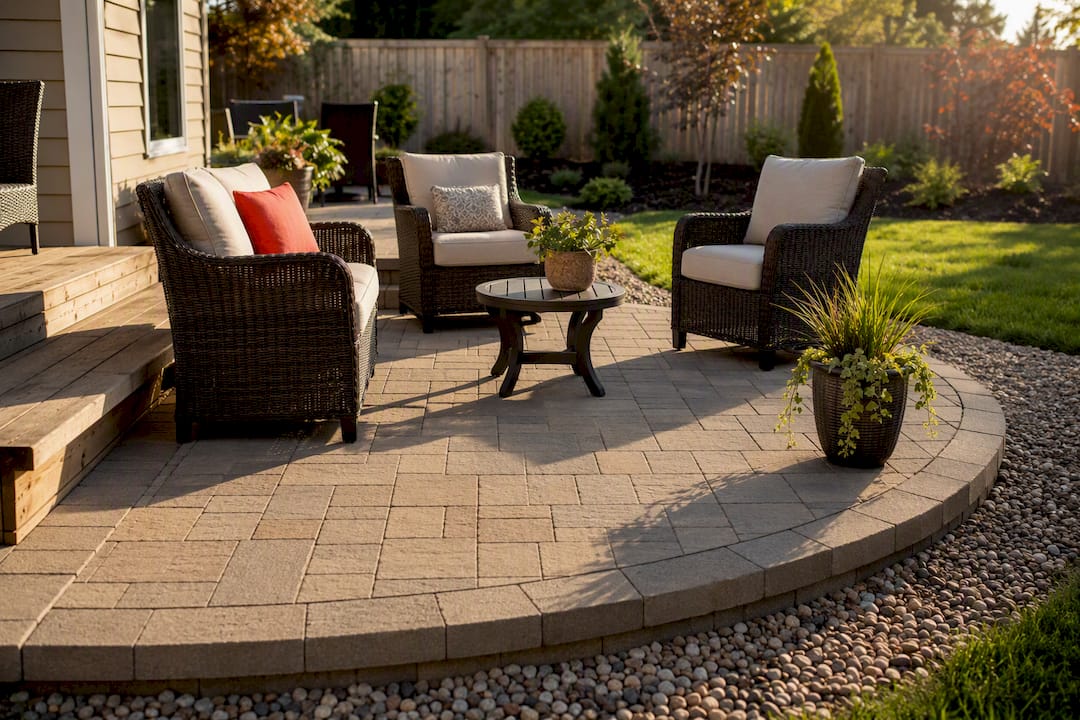
Whatever you choose, the same three prep steps apply: compact the base soil, lay geotextile fabric to stop weed growth and material migration, and install edge restraint so gravel or pavers don’t creep over time. Where a small project still calls for a professional is grading, since getting the slope wrong invites water into places you don’t want it, and any tie-in to an existing slab, where a bad connection can crack both surfaces.
Details That Make an Extension Look Built-In
Small finishing touches do more to hide a seam than the pour itself. A low sitting wall, a run of planters, or a lighting strip along the new edge draws the eye away from where old and new concrete meet, showcasing effective outdoor lighting solutions that enhance your patio’s ambiance. For electrical work, stick to GFCI-protected outlets for anything near moisture, and choose low-voltage lighting kits over hardwired fixtures unless you’re bringing in a licensed electrician. If the color mismatch bothers you more than the budget does, resurfacing the entire patio after the extension often solves it in one pass.
When a Patio Extension Calls for a Licensed Contractor
An incorrect base depth, missed doweling, or a drainage slope in the wrong direction are the three mistakes that turn a weekend project into a costly redo. They bring over 20 years of experience with licensed, insured crews and a focus on sustainable materials to concrete, paving, and finishing projects, and offer free quotes so you know the scope before committing. Ask any contractor for an itemized estimate, written scope of work, confirmation of who handles permits, and references from recent jobs.
Site Prep, Grading, and the Installation Sequence That Actually Holds Up
The steps that make or break a patio extension happen before the first bag of concrete or pallet of pavers arrives. Start by clearing the footprint of grass, roots, and topsoil down to stable subgrade. Grading comes next: the whole point is establishing that outward slope away from the house so water has somewhere to go instead of pooling against your foundation.
Once the grade is set, the base layer goes in. A compacted gravel base, usually crushed stone in the 4 to 6 inch range, gives concrete and pavers alike a stable foundation that resists shifting and settling. Compaction matters as much as the material itself. A plate compactor run in thin lifts, rather than dumping the full depth and compacting once, produces a base that won’t settle unevenly six months later.
For concrete, forms go up next, followed by any dowels or reinforcement, then the pour and finish work. For pavers, a leveling layer of coarse sand sits on top of the base, screeded flat before pavers are set and joints filled with polymeric sand. Either way, the finishing step is where the extension either blends in or announces itself: matching broom finish texture, aligning paver patterns with the original layout, and keeping control joints consistent with the existing slab’s spacing all make a visible difference in the finished look.
What a Patio Extension Costs and How Long It Takes
Costs shift a lot depending on material and site conditions, but the shape of the budget is predictable. Gravel is the cheapest way to add square footage and the fastest to install, often wrapping up in a single weekend for a modest area. Concrete typically costs less per square foot than pavers for the same footprint, though matching an aged slab’s color and texture adds labor. Pavers cost more upfront but bring design flexibility and easier future repairs, since you can swap a cracked unit without redoing the whole surface. An overlay, applied over an existing sound slab, is often the least expensive way to make old and new sections look like one continuous patio.
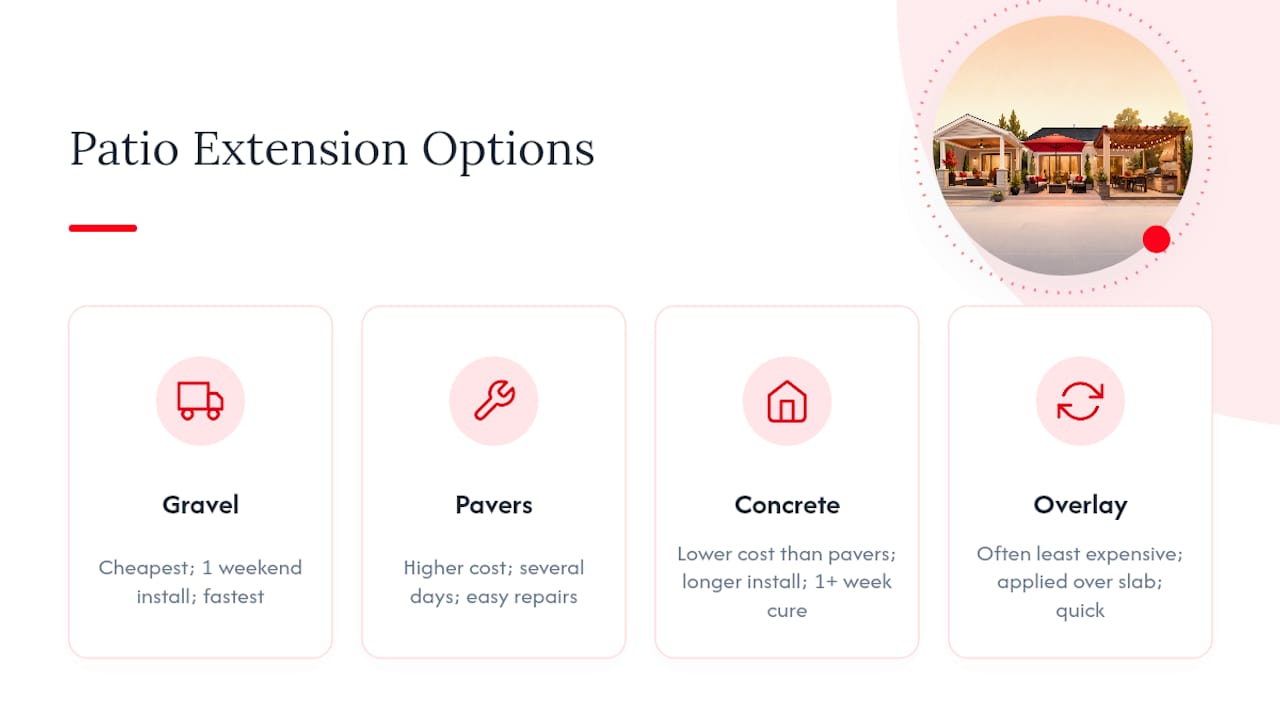
Timeline follows a similar pattern. A gravel pad or stepping-stone path can be done in a day or two. A paver extension over a properly compacted base usually takes several days once you count excavation, base work, and joint sand. A doweled concrete pour needs time built in for forming, pouring, finishing, and a curing period of at least a week before it can handle furniture or foot traffic. For a clearer breakdown of what factors move the price most, our concrete patio cost guide covers the details specific to poured surfaces.
Furnishing the New Space Without Making It Feel Cramped
An extension is only as good as what you put on it. Before buying furniture, measure the new footprint and leave at least 3 feet of clearance around any dining table or seating cluster so people can walk through without squeezing past chairs. A deck-sizing approach works just as well for patios: our deck size planning guide has footprint rules of thumb that translate directly to concrete and paver patios.
Zone the space by function rather than filling it edge to edge. A dining set anchors one section, a low-slung lounge arrangement anchors another, and a fire pit with a few chairs pulled around it can occupy a smaller extension entirely on its own. If your new area is a semicircle or an odd shape, curved or modular furniture tends to fit better than rectangular sets designed for a square footprint.
Material choice matters as much on furniture as it does on the patio itself. Powder-coated aluminum and HDPE resin wicker hold up to weather with minimal upkeep, while natural wood pieces need periodic sealing to avoid graying. Leave a few feet of buffer between furniture groupings and any planters or sitting walls you’ve added, both for walking room and so plants have space to fill in without crowding the seating.
Do You Need a Permit to Extend Your Patio?
Ground-level patio extensions, whether concrete, pavers, or gravel, typically don’t require a building permit in most jurisdictions, since they don’t add structural load or change the building envelope. That changes the moment you add a roof, attach a structure to the house, or build anything that affects drainage or setback lines. A pergola, an attached patio cover, or a screened enclosure almost always falls under your local building code and needs a permit review.
Rules vary by city and county, and some areas regulate patios above a certain square footage even without a roof, so a call to your local building department before you start is worth the ten minutes it takes. If you’re adding any covered structure, our deck building permits guide covers how that review process typically works, since the permitting logic for a covered deck and a covered patio tends to overlap. Electrical additions, like wiring a hardwired light fixture or a new outdoor outlet, usually require a separate electrical permit regardless of whether the patio itself needs one.
Why Buildability Beats Pinterest Boards
Most patio content sells you on the look and skips the part where the slab actually has to hold together. That’s backwards. The prettiest hexagon paver layout or curved flagstone border means nothing if it’s sitting on 2 inches of uncompacted base that settles unevenly by next spring.
What the research here actually supports is a sequencing problem: figure out what your existing slab can handle before you fall in love with a design. A heaving slab rules out a doweled pour no matter how much you want the seamless look. Poor soil drainage rules out certain paver patterns unless you’re willing to invest in a proper base. The idea comes second. The site conditions come first.
If there’s one thing homeowners underestimate, it’s how much a correct base and slope matter compared to the surface material sitting on top. A gravel pad installed correctly will outlast a beautiful paver job installed on a shortcut base. Get the boring part right, and the design choices become a lot more forgiving.
— Abraham
Get a Free Quote for Your Patio Extension
If you’d rather skip the guesswork on base depth, doweling, and drainage slope, they bring licensed, insured crews and extensive experience to patio extension projects, with a focus on sustainable materials and pricing tailored to your budget. A free quote gets you a real number instead of a rough estimate off a cost calculator.

Before you request a quote, gather a few basics: photos of your existing patio and the area you want to extend, rough dimensions of the addition, and a sense of whether you want a seamless match, a covered structure, or a design-forward look with pavers or stone. That gives our team enough to scope the job accurately on the first visit. Head to the concrete pouring, paving, and finishing services page to see what’s included and request your free site review.
Sources
- How to Extend a Concrete Patio — ConcreteNetwork
- 8 Patio extension ideas for outdoor living — Family Handyman
- How to extend a patio — This Old House
- How to Extend a Concrete Patio Without a Visible Seam — Ace Concrete Contractors Austin
FAQ
How Can I Extend My Patio Cheaply?
Gravel pads with steel or paver edging are the most budget-friendly option and can often be installed in a weekend. Stepping stones set into turf or mulch cost even less if you only need a path to a seating area, not a full hardscaped surface.
How Do You Extend an Existing Patio?
Confirm your existing slab is stable, then choose between a doweled concrete pour for a seamless match, or pavers and gravel for a defined, contrasting section. Either way, the core sequence is layout, utility locating, excavation, a compacted base, and proper drainage slope before finishing.
Can I Extend a Concrete Patio With Pavers?
Yes, and pavers are actually a strong choice here because they tolerate ground movement better than a rigid concrete extension tied to an existing slab. Set them over a compacted gravel base with a sand leveling layer, and use an edge restraint where the pavers meet the original concrete.
How Do You Extend an Existing Covered Patio?
Extending a covered patio usually means matching both the floor surface and the roof structure, and the roof portion is what typically triggers a permit review. Check with your local building department before adding to an attached roof, and see our deck building permits guide for how that process generally unfolds.
Do I Need a Permit to Add a Patio Extension?
A ground-level patio extension without a roof usually doesn’t require a permit, but that changes as soon as you attach a structure, add a roof, or affect drainage and setback lines. Rules vary by city, so confirm with your local building department before starting any covered addition.